The Backstage view in Word is rarely explored past the surface or used to its full potential.
Most people just travel through the backstage to save or print their documents.
But upon closer inspection, there are many other tools available. You can protect your document and your intellectual property as well as inspect the document for flaws.
1. The Document Information Panel
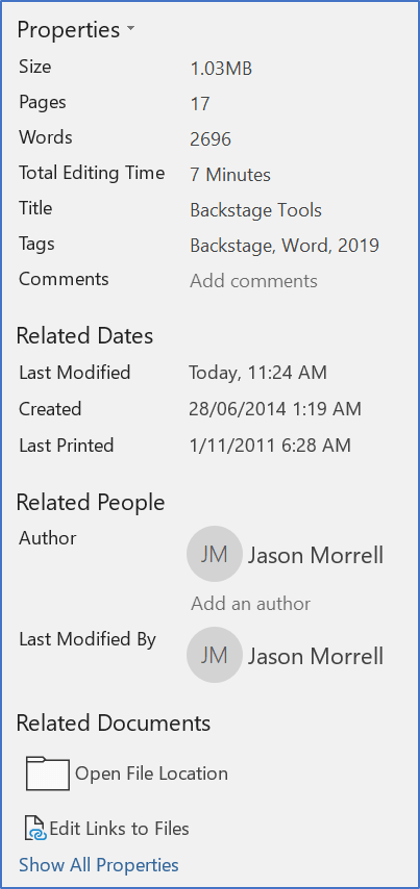
Each document has a set of properties that can be changed. These properties include information such as the author’s name, the document title, keywords (which can be used for searches), projects and manager names. There are also a variety of properties that are system-generated, such as the date the document was last modified.
To view or change document information:
1. Click the File tab.
2. Choose Info on the left panel.
3. The document properties are listed on the right side of the screen.
4. Some properties such as Title and Tags can be edited to reflect the content of the document.
5. Some properties such as the Total Editing Time are system generated and cannot be changed manually.
To view additional properties, click the Show All Properties link at the bottom.
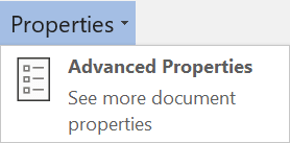
To display the Advanced Properties:
1. Click the little drop-down arrow on the Properties heading.
2. Choose Advanced Properties.
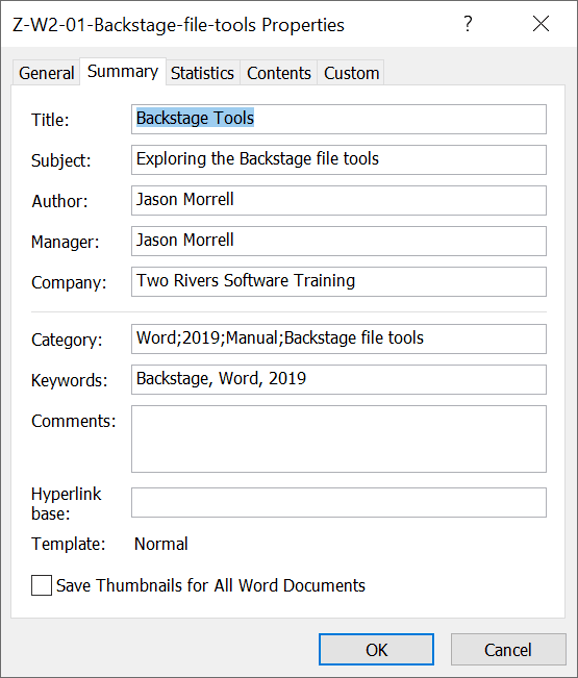
This displays a dialog box with five tabs.
Each tab contains information which has either been defined by the author or is system-generated
Information entered can be cross-referenced later in the document by inserting Document Info fields.
2. Protecting Documents
In a team environment where documents may have many contributors, it is wise to implement certain controls to ensure that documents are not lost, corrupted, destroyed or inadvertently changed
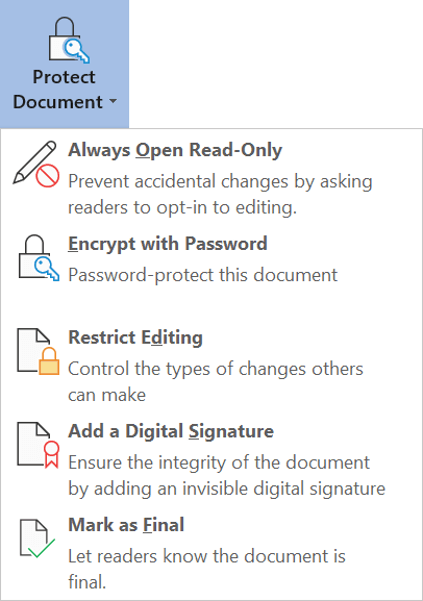
The Backstage provides 5 tools to implement measures to protect a document.
1. Select the File tab.
2. Click Info on the left side panel, if necessary.
3. Click the Protect Document button and select one or more of the options presented:
a) Protecting a document by marking it as FINAL
When a document is complete and you want to lock it down to prevent any further changes, the Mark as Final option will protect the document by making it read-only
Mark as Final is the minimum form of document protection and can be easily bypassed.
1. Select the File tab and click Info on the left side panel, if necessary.
2. Click the Protect Document button.
3. Select Mark as Final.
A confirmation page is displayed.
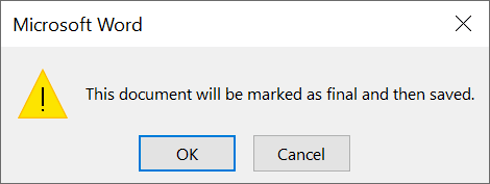
If you are sure you want to proceed, click OK and a confirmation statement is displayed.

This is the weakest form of protection available. The next time the document is opened, a message in the status bar at the top of the screen states that the document is marked as final to ‘discourage’ further editing, but an ‘Edit Anyway’ button is provided which lets you bypass the restriction.

b) Protecting a document by making it Read-Only
A simple way to protect a document is to only allow it to be opened but not modified.
1. Select the File tab and click Info on the left side panel, if necessary.
2. Click the Protect Document button.
3. Select Always Open Read-Only.
The button changes colour to show that the option is switched on. A message confirms this.

c) Protecting a document with a password
A stronger form of protection is to add a password and then only give the password to particular people.
1. Select the File tab and click Info on the left side panel, if necessary.
2. Click the Protect Document button.
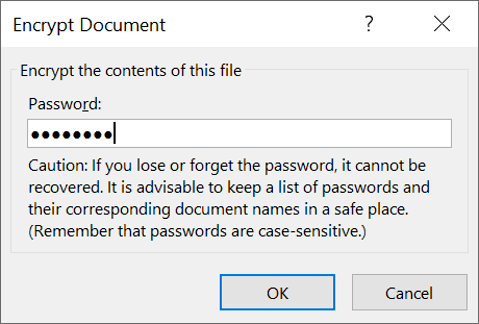
3. Select Encrypt with Password. The Encrypt Document dialog box is displayed.
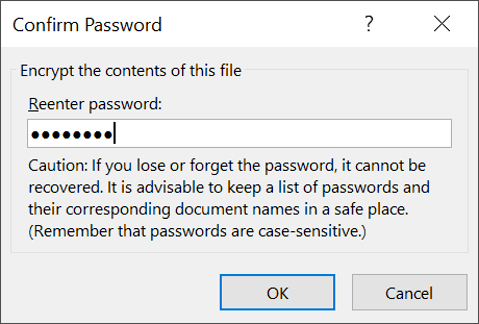
4. Type, then re-type a secure password pressing « each time.
d) Protecting a document by restricting editing
Rather than using blanket password protection, a more flexible way of allowing different people to work on the document but with particular restrictions applied is to use the Restrict Editing option.
1. Select the File tab and click Info on the left side panel, if necessary.
2. Click the Protect Document button.
3. Select Restrict Editing.
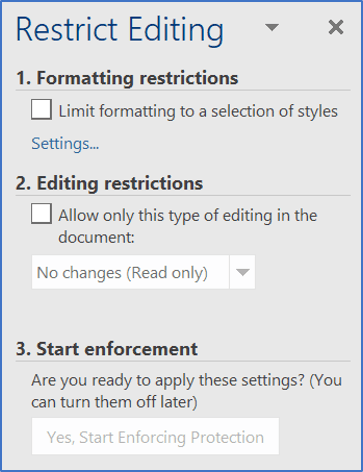
The Restrict Editing sidebar is displayed where you can apply formatting or editing restrictions.
To restrict the FORMATTING:
1. Tick the Limit formatting to a selection of styles box.
2. Click the small blue Settings link, just below the tick box.
The Formatting Restrictions dialog box is displayed. All the styles available in the current document are listed. These include standard and custom styles
3. Tick the styles that you would like users to be able to use.
4. Untick any styles that you do not want users to use.
5. Tick Allow Autoformat to override formatting restrictions to allow the table styles to be used.
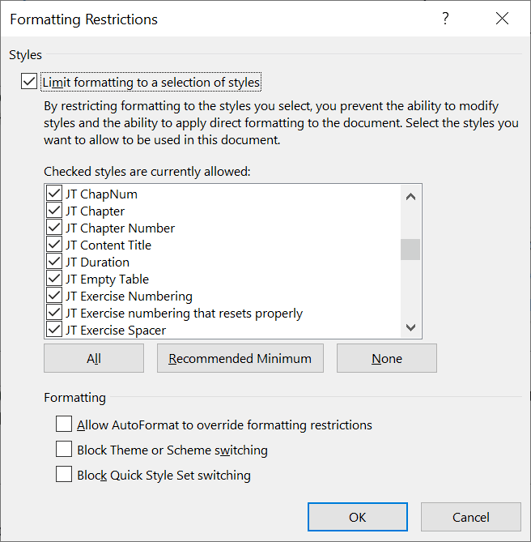
6. Tick Block Theme or Scheme switching to restrict users to the current document theme, colour scheme and font scheme settings.
7. Tick Block Quick Style Set switching to restrict users to only being able to use the current Quick Style Set.
To restrict the EDITING:
1. Tick the Allow only this type of editing in the document tick box.
The drop-down box beneath the tick box is now active.
2. In the drop-down box, choose
■ Tracked changes
■ Comments or
■ Filling in forms.
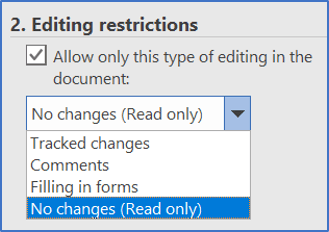
3. For a blanket editing restriction, choose No changes (Read-only).
A second section called Exceptions also opens up when the editing is restricted. There is a single default entry called Everyone.
To add exceptions for particular users or groups (to give them a free pass where everyone else is restricted):
1. Click More users...
2. Type the user name(s) separated by semicolons
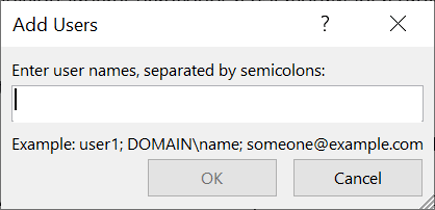
Users and user groups are controlled by your IT department. It works the same as the global address list in Outlook.
To activate the restrictions:
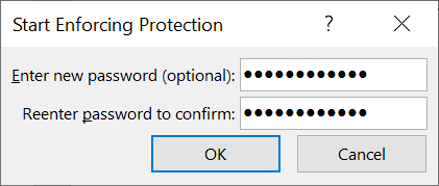
1. Click Yes, Start Enforcing Protection in section 3 of the Restrict Editing sidebar.
2. Enter and re-enter a password then press Enter to prevent anybody who is not privy to the password from changing the editing and formatting restrictions
Restricted regions for a user will be highlighted and shown in square brackets

To revoke access for a user or group:
1. Click the drop-down arrow next to the user/group name
2. Choose Remove all editing permissions for this user.
For a user to find what parts of the document they can access:
3. Select the File tab and click Info on the left side panel, if necessary.
4. Click the Protect Document button.
5. Select Restrict Editing.
6. On the Restrict Editing sidebar, click the drop-down arrow next to the user name listed under Exceptions.
7. Choose one of the three options offered (shown here)

e) Protecting a document with a digital signature
Digital signatures have been around for several years. They must be purchased from a verified Microsoft partner, but they are useful:
To get a digital signature for a document:
1. Select the File tab and click Info on the left side panel, if necessary.
2. Click the Protect Document icon.
3. Select Add a Digital Signature.
4. A message pops up asking if you would like to get a digital signature from a verified Microsoft partner.
5. Choose Yes.
Word will then open a browser window and take you to a page on the Microsoft website, listing the services of some reputable digital signature providers.

6. Click the links, read the info and choose a provider.
3. Inspecting a document for flaws & issues
You should check your document’s integrity upon completion. Thankfully Microsoft has collated all the things you should check into a single place and you can run through it like a checklist.
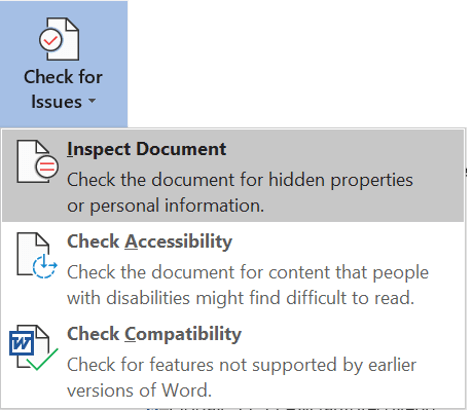
The three main integrity checks are:
Let’s consider each of those individually.
a) Inspecting a doc for hidden & personal info
To inspect a document for hidden properties or personal information:
1. Select the File tab then click Info on the left side panel, if necessary.
2. Click the Check for Issues button.
3. Select Inspect Document.
You are prompted to save your document before starting the inspection

4. Click Yes to save the document before you inspect it.
A large dialog box is then displayed where you can specify which document elements to check.
5. Tick or untick each choice as needed.
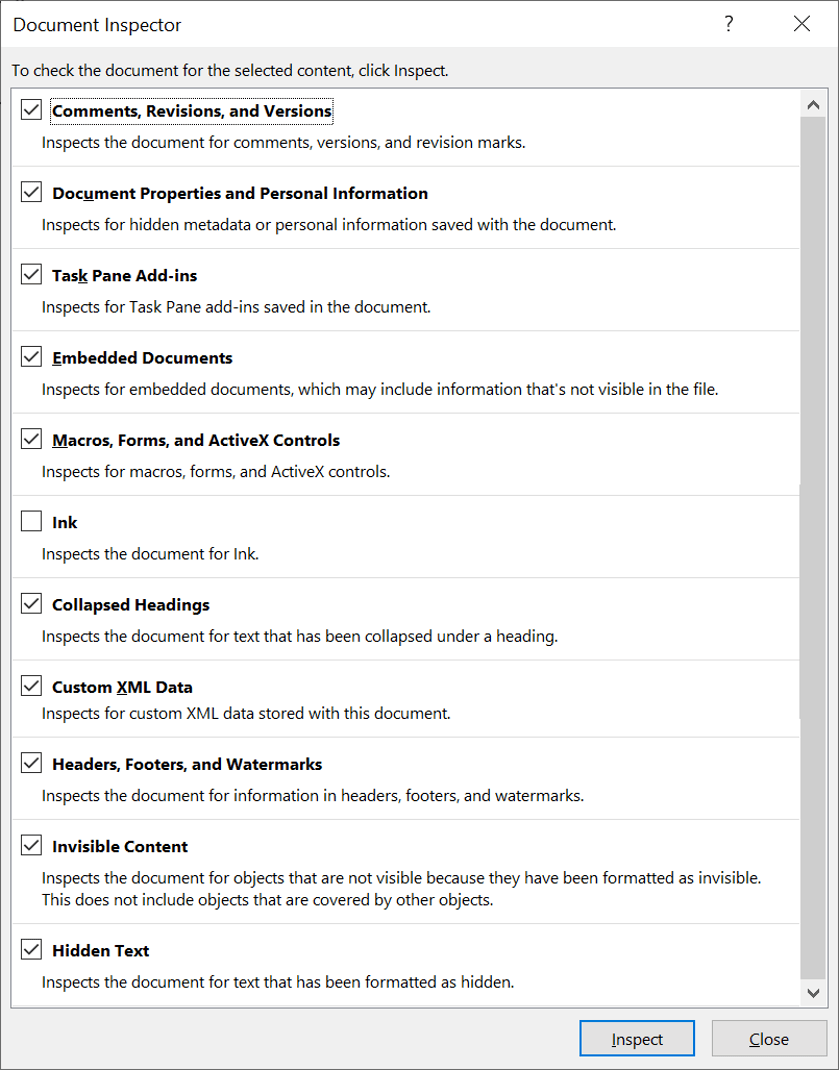
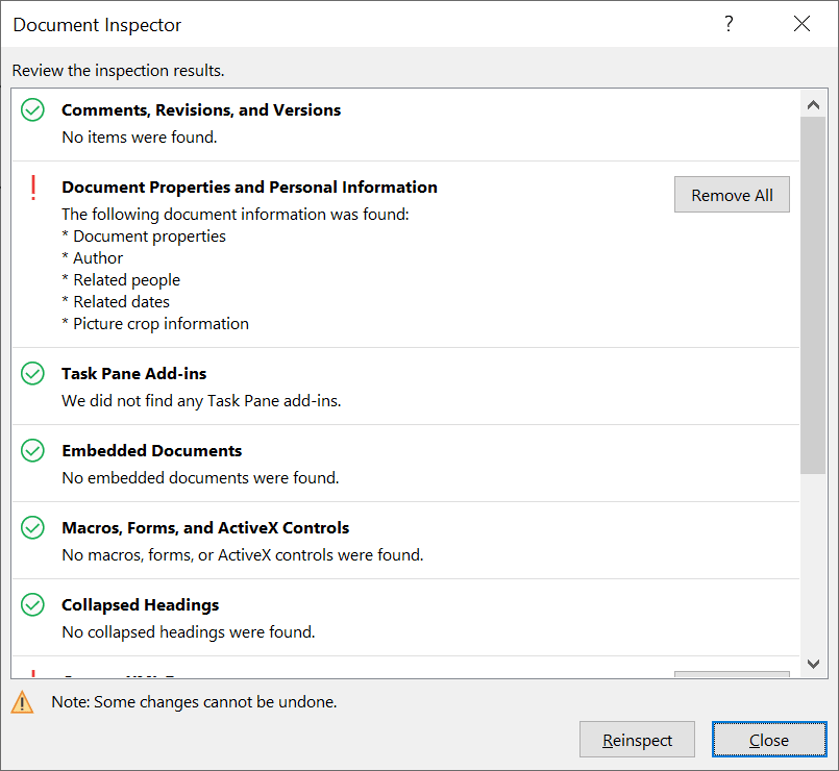
6. Click Impact. Any issues are identified and listed.
b) Inspecting a doc for accessibility
Individuals with poor eyesight or other impairments often use special software that reads the contents of a document to the individual. If the document is well structured and has been checked for accessibility issues, then you are exercising due diligence.
Many large organisations and government departments make it a requirement for documents to be accessibility friendly.
To inspect a document for content that people with visual disabilities might find difficult:
1. Select the File tab then click Info on the left side panel, if necessary.
2. Click the Check for Issues button.
3. Select Check Accessibility.
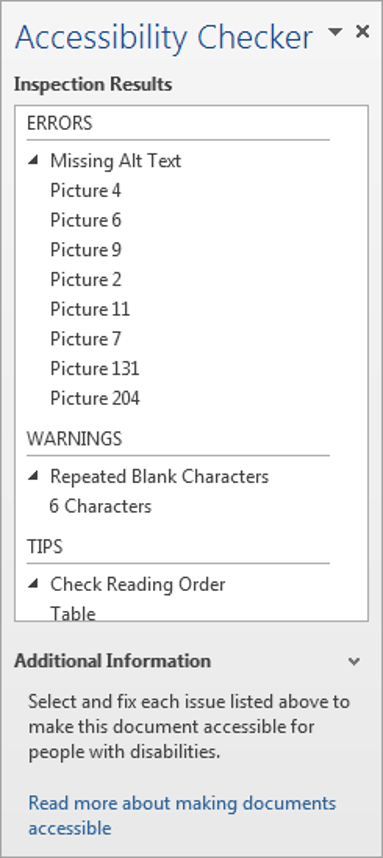
The Inspection Results are displayed in the side pane. They are broken down into sections
In the example of the right, the Missing Alt Text is referring to images. The Alt text for an image is a short description of the picture and a longer description on a diagram. To a person who cannot see for themselves, these descriptions are vital.
c) Inspecting a doc for compatibility
Most people upgrade their software every 2 or 3 years which means their version of Microsoft Office is up-to-date (or one version old)
Oddly, three common exceptions to this trend are government departments, councils and the legal profession, all with a bigger budget than most but tight fists!
The point here is that you should check your document to make sure there are no major compatibility issues if you need to share your document with an individual or organisation that is still using an old version of Office.
To inspect a document for features that are not supported by earlier versions of Word:
1. Select the File tab then click Info on the left side panel, if necessary.
2. Click the Check for Issues button.
3. Select Check Compatibility.
4. Click the Select versions to show button and select which versions of Word you want to check for compatibility.
Compatibility issues are listed in the main window.
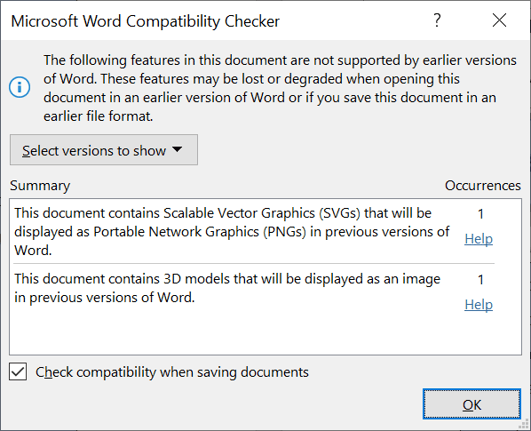
In the example above, an icon and a 3D Model (both recent additions) were inserted into the document. When checked for compatibility, these two elements are identified, and the appropriate action is summarised – in this case, each will be converted to images if an older version of Word is used to open the document.
4. Summary of key points
I hope this has opened, your eys, given you a few ideas and made you aware of how vulnerable you could be and what you can do to remedy that.
I hope you found plenty of value in this post. I'd love to hear your biggest takeaway in the comments below together with any questions you may have.
Have a fantastic day.


About the author
Jason Morrell
Jason Morrell is a professional trainer, consultant and course creator who lives on the glorious Gold Coast in Queensland, Australia.
He helps people of all levels unleash and leverage the power contained within Microsoft Office by delivering training, troubleshooting services and taking on client projects. He loves to simplify tricky concepts and provide helpful, proven, actionable advice that can be implemented for quick results.
Purely for amusement he sometimes talks about himself in the third person.
SHARE

