Whatever you do on a computer you will need to manage windows and dialogs, so it is a good idea to get familiar with these essential components.
1. What are windows?
Whenever you open a program (e.g. MIcrosoft Word), it opens in its own app window.
In the image below, there are 2 windows, one for Microsoft Word and one for an internet browser.
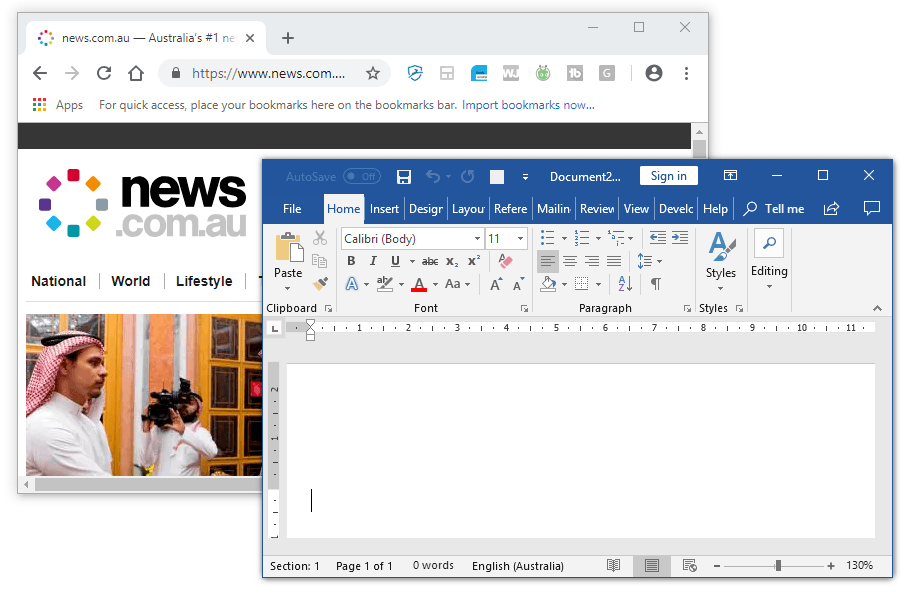
You can hide, show, move or resize any window.
In the same way that a house has many windows but you can only look through one at a time, or a library has many books but you can only read one book at a time, so it is with computers. You may have several windows open but you can only work on one at a time.
To select a different window, click on it (if it is visible) or click its app icon. on the taskbar (the bar at the bottom of the screen).
If you’re working with lots of windows, you can hold down the ALT key then tap the TAB key once to display thumbnail images of each acrtive window, then with ALT still press tap the TAB key repoeatedly until you land on teh window you want to switch to.
2. How to manage windows effectively
Whenever you open an app window (e.g. Microsoft Word), at the top centre of the window is a TITLE BAR showing the file name or program name. In the top right corner are 3 standard buttons which minimise, maximise/restore or close the window. Each of those functions are explained in a moment.
You can also move, resize or dock a window.
When an app is open, the taskbar app icon is underlined. As you'll see in a moment, this is important.
3. Minimising a window
In the set of 3 buttons on the right side of the title bar, the first button minimises the window, which means it disappears from view.
However, just because you can't see the window now, it is still there.
To get the window to reappear, single-left-click the app icon on the taskbar. You can then continue working on it.
4. Maximising or restoring a window
The middle button actually serves two purposes and you can toggle between the two states.
If the window is currently maximised (displayed at the maximum screen size), the restore icon is displayed, which makes the window resizeable again.
If the window is currently restored (not displayed at maximum size), the icon is displayed, which when clicked will maximise the window to teh full screen size.
Only a restored window can be moved, resized or docked which is very useful if you want to work with two or more windows simultaneously.
5. Closing a window
To close a window:
1. Single-left-click the X button in the top-right corner of the app window.
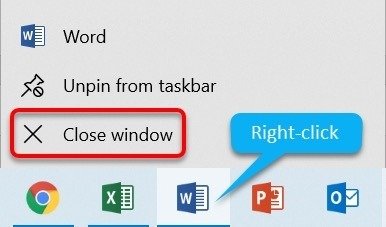
2. Alternatively, right-click the task bar button of the app you want to close then single-left-click CLOSE WINDOW or CLOSE ALL WINDOWS.
6. Moving a window
To resize a window:
1. Position the mouse pointer over the title bar of the window.
2. Click-and-drag the window (using the left mouse button) to a new location.
3. Release the mouse button.
7. Resizing a window
You can only resize a restored window, not a maximised window.
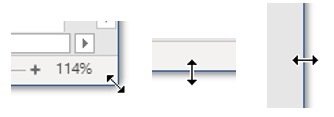
To resize a window hover over any corner or any of the fours side of the window and you will see a 2-headed arrow.
1. Using the mouse, click-and-drag the border inwards or outwards.
2. Release the mouse button when the window is at the desired size.
The corner handles are better to use because you can change height and width at the same time.
8. Docking a window
Docking a window means fixing it (or locking it) to a particular position on the screen.
To dock the window precisely in the left half or the right half of the screen (without guesswork):
1. Hover the mouse pointer over the title bar of the window.
2. Drag the window until the mouse pointer is touching the left edge or right edge of the screen.
3. When the preview frame is displayed, release the mouse button.
You can also use these keyboard shortcuts.
To dock the window precisely in one of the four quarters of the screen:
1. Hover the mouse pointer over the title bar of the window.
2. Drag the window until the mouse pointer is touching the top-left corner, top-right corner, bottom-left corner or bottom-right corner of the screen.
3. When the quarter preview frame is displayed, release the mouse button.
You can also use these keyboard shortcuts.
9. The Show Desktop tool
If you have lots of windows open and you need to get back to your desktop quickly with minimising or closing all the open windows
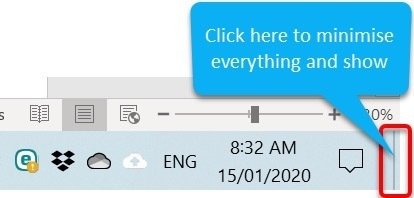
Click the Show Desktop tool.
The Show Desktop icon is situated on the far-right of the task bar. Single-left-click it to minimise all opened windows.
Not many people know this feature is there. It's hardly mentioned anywhere.
10. Working with Dialogs (a.k.a. Dialog Boxes)
Dialog boxes are a part of everyday life on a computer. Every time you open a file, print or change some settings a dialog box pops up.
Here is an example dialog from Word.
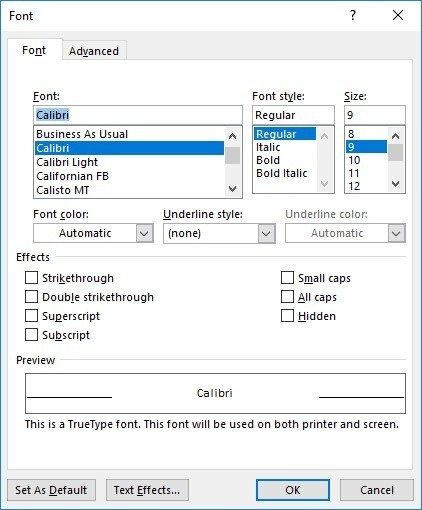
Each dialog box is different, but they all contain a combination of common features which are discussed below.
11. Tabbed pages (in a dialog)
Each dialog box is different, but they all contain a combination of common features which are discussed below.
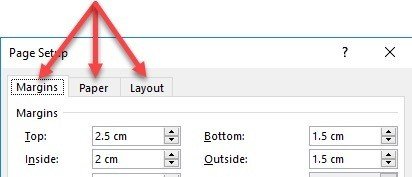
To switch to a different tabbed page:
1. Position the mouse pointer over the tab.
2. Single-left-click the tab.
12. Dropdown lists (in a dialog)
A drop-down list is used to display a predefined set of choices. This eliminates the need to type. It can also reduce errors.
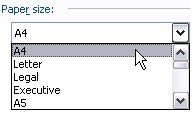
To select a choice from the drop-down list:
1. Single-left-click the dropdown arrow to display the drop-down options.
2. Single-left-click the option you want.
13. Text boxes (in a dialog)
A text box is a blank white box that allows you to type anything you like. Text boxes are often used to collect name and address information.

14. Tick boxes (a.k.a. check boxes)
Tick boxes (or check boxes as our American friends call them) are used for Yes or No, On or Off, Selected or Unselected type responses.
Single-left-click the tick box to add or remove the tick mark.

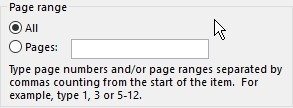
15. Option buttons (in a dialog)
Option buttons (a.k.a. radio buttons) are a variation on tick boxes.
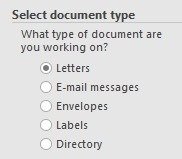
16. Spinners (a.k.a. spinner buttons)
Spinner arrows allow you to nudge a numerical value up or down by left-clicking the up or down spinners.

17. Command buttons
Most dialog boxes have at least one command button.
To perform the button function, single-left click on the button.
18. Scroll bars
Scroll bars are used when the window is too small to contain all the required information. A vertical scroll bar lets you scroll up or down to view more information while a horizontal scroll bar lets you scroll left or right.
To move up or down, left or right, one item at a time, single-left-click the up arrow, down arrow, left arrow or right arrow buttons at the end of the scroll bar.
A square marker is situated along the scroll bar to indicate the current viewpoint position
Rather than clicking the scroll arrows, you can single-left-click anywhere along the scroll bar or click-and-drag the square marker to a new position.
You may also use the scroll wheel on the mouse to scroll up or down.
19. Wrap
You now have the basics under your belt.
You can manage windows that are open on your computer and have full control over when to show, hide, move, resize, open, close or dock them.
You have also seen how to use various components in a dialog box which are found in just about every program you use.
I trust this has open your eyes and removed some of the confusion.
I hope you found plenty of value in this post. I'd love to hear your biggest takeaway in the comments below together with any questions you may have.
Have a fantastic day.


About the author
Jason Morrell
Jason Morrell is a professional trainer, consultant and course creator who lives on the glorious Gold Coast in Queensland, Australia.
He helps people of all levels unleash and leverage the power contained within Microsoft Office by delivering training, troubleshooting services and taking on client projects. He loves to simplify tricky concepts and provide helpful, proven, actionable advice that can be implemented for quick results.
Purely for amusement he sometimes talks about himself in the third person.
SHARE

