Once your document is nearing completion, you should run some simple checks and select the appropriate Word auditing tool to ensure that everything is in order.
In this post you'll discover how to check your spelling and grammar, use synonyms to make your prose more interesting and some interesting ways to use cut, copy and paste (including at least one tool hardly anyone knows about).
1. Word Auditing Tool #1: SPELLING & GRAMMAR CHECK
Once your document is complete you should run a spell-check. It would be a real shame to publish a masterful document and then discover a typo, wouldn't it.
There are two ways you can check your spelling & grammar.
CHECK THE SCREEN


RUN A SPELL CHECK
Errors are presented one at a time. You can then choose to ignore them or change them.
As a beginner, concentrate on spelling mistakes but don’t worry about grammatical errors, as these appear for all sorts of reasons and unless you have a masters in English you can spend a lot of time chasing your tail trying to fix all the grammatical errors in your document.
The red and blue squiggles are not printed; they are an on-screen aid, designed to highlight errors in real time.
a) How to start a spell check
To conduct a complete spell-check of your document at any time.
1. Press Ctrl + A to select the entire document or Ctrl + Home to start at the top of the document.
2. Press F7 to start the Spell Check.
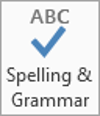
Alternatively, single-left-click the REVIEW tab, then single-left-click the SPELLING & GRAMMAR icon on the left-side of the ribbon.
This displays the Editor sidebar, which contains all the tools required to address spellings that Word does not recognise.
Every word within the document is checked against Microsoft's built-in dictionary. When it cannot find a match, it flags it as a possible spelling error.
Word will suggest some alternatives.
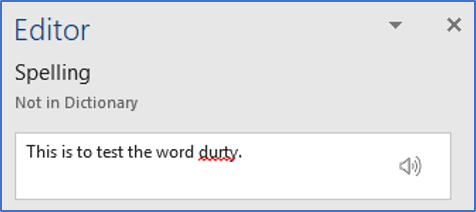
b) How to fix a spelling error
If the word is indeed misspelt, you can change it for the correct spelling.
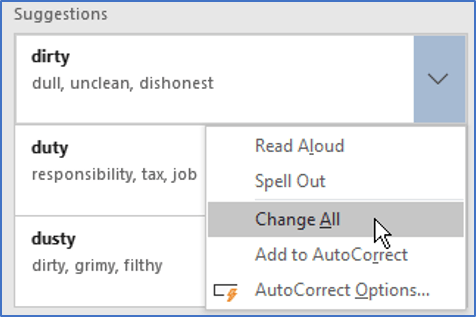
c) How to ignore a flagged word
If the flagged word is a genuine word, such as a name or a place, you can ignore it and move onto the next error.

d) How to add a flagged word to the dictionary
If the highlighted word is one you use often, and you have spelt it correctly, you may add it to the dictionary, so it will not be flagged again.

e) How to manually fix a spelling error
If none of the suggested words are correct:

When the spell check is complete, a confirmation message is displayed.
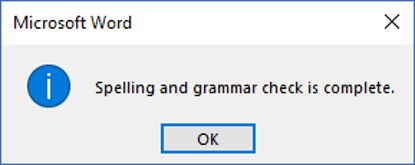
f) How to ensure your language settings are correct
It is important to check your spelling against the appropriate language for your reader. Even a common language like English has different spellings throughout the world. For example, color vs colour, gray vs grey and aluminum vs aluminium.
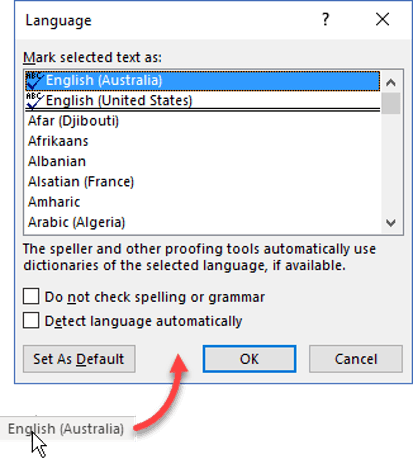
At the bottom of the side pane there is a drop-down list of languages to you can switch from English (UK) to English (Australia) to English (US) or whatever your preferred language is.
To spellcheck in your language:
1. Press Ctrl + A to select the entire document.
2. Single-left-click ENGLISH (AUSTRALIA) or whatever language is displayed on the status bar.
3. On the LANGUAGE dialog select your desired language.
4. UNTICK the box labelled DO NOT CHECK SPELLING OR GRAMMAR to ensure that everything gets checked. This option has a weird arrangement, like a double-negative
Tick/check the SET AS DEFAULT button to use this language as the default in all future new documents.
2. Word Auditing Tool #2: SYNONYMs (make your prose interesting)
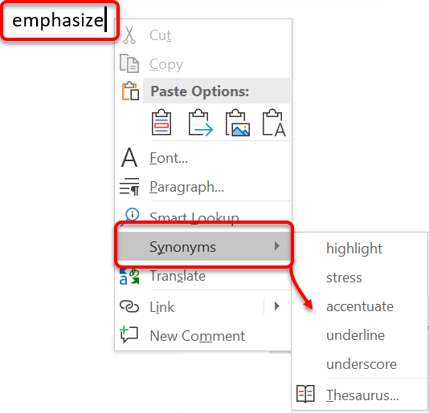
A synonym is an alternative word with the same meaning. The image to the right shows the synonyms for the word emphasize.
To display synonyms:
1. Right-click on a word.
2. Choose SYNONYMS in the context menu.
3. On the submenu, choose a synonym from the list.
3. Word Auditing Tool #3: CUT, COPY & PASTE
One of the most useful techniques you can learn as a beginner is to CUT, COPY & PASTE, which allows you to MOVE or COPY items. Items include text, tables, pictures, files and more.
The techniques described in this chapter are demonstrated using a Microsoft Word document, but are universal, so once you have mastered them you can use them in any application.
CUT, COPY & PASTE are always found together.
a) How to move something
To move something from A to B, you first CUT it from A then PASTE it to B.
1. Select the item (text, picture etc.)
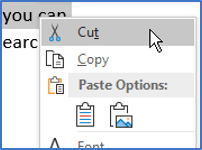
2. CUT the item. To cut:
3. Single-left-click to place the cursor in the location that you wish to move the item to.
4. PASTE the item. To paste:
b) How to copy something
To copy / clone / duplicate something, you first COPY the original item then PASTE it where you want the copy to be placed.
1. Select the item (text, picture etc.)
2. COPY the item. To copy:
3. Single-left-click to place the cursor in the location where you wish to place copy.
4. PASTE the item. To paste:
Once you have done this a few times, you'll realise that it's a 1-2 second process despite the length of the instructions written above!
Also worth mentioning – once you have cut or copied an item, you can paste it as many times as you want.
c) How to copy formatting, not content
Once you start to grow in confidence and create larger documents, you'll find yourself formatting many things the same way. The best solution is to use STYLES but there is also a neat little tool called Format Painter, which enables you to copy and paste a FORMAT, not CONTENT.
Here's how it works:
If you want to apply this formatting that you've already done …
This is my source text
… to this text
This is my destination text
1. Single-left-click to place the cursor somewhere in the source text. You don't need to select the actual text if you don't want to.
2. Single-left-click the Format Painter icon.
![[E1] 05 - 13 format painter The Format Painter tool lets you copy and paste FORMATTING rather than content. There is rarely a day goes by where I don't use this fantastic Word auditing tool.](https://d1pzfp4ixszkr4.cloudfront.net/img/2020/03/01094920/E1-05-13-format-painter.png)
3. Select the text that you wish to apply the same formatting to. The formatting you copied will be applied.
To use the Format Painter tool to copy some formatting from one item to lots of other items:
1. Single-left-click to place the cursor somewhere in the source text.
2. Double-left-click the Format Painter icon.
3. Select the first item that you wish to apply the same formatting to. The Painter will remain active.
4. Select any additional items you wish to format.
5. Single-left-click the Format Painter icon to switch it off.
d) How to move or copy items between documents
Use this process:
1. In the first document, select the item that you want to move or copy.
2. Using any technique shown above, CUT or COPY the item.
3. Go to the second document.
4. Using any technique shown above, PASTE the item into the second document.
e) The Office Clipboard vs the Windows Clipboard
The downside of regular cut, copy and paste is that the computer can only hold one item at a time. If you copy ITEM 1 then copy ITEM 2, when you paste, only ITEM 2 (the latest item) will be pasted.
That's because items that you cut or copy are stored on the Windows Clipboard, which can only store one item. One in, one out.
However, there is a second clipboard (less well known) which holds up to 24 items at a time. It works on a rolling basis, so when you copy the 25th item the first item is pushed off the clipboard. But 24 is still useful.
It's called the Office Clipboard.
Here's how it works:
1. Single-left-click the HOME tab.
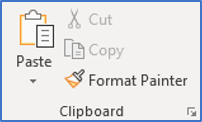
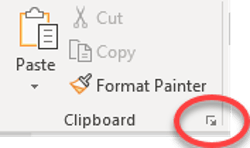
2. Click the launcher (see right) in the Clipboard group.
The Office Clipboard is displayed in the left side pane.
3. Select the first item and COPY.
4. Select the second item and COPY.
5. Repeat for as many items as you want.
Each item is added to the clipboard in the side pane.
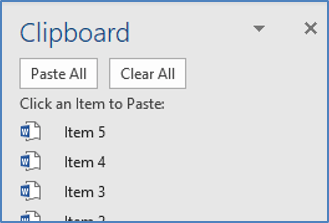
To paste any of your collected clipboard items.
1. Single-left-click on your document to position the cursor.
2. Single-left-click the item in the side pane.
To paste all of your collected clipboard items into one location:
1. Single-left-click on your document to position the cursor.
2. Single-left-click PASTE ALL in the side pane
To remove a clipboard item:
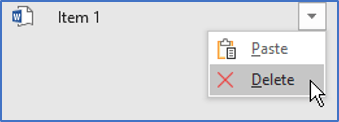
1. Hover over the clipboard item you wish to remove.
2. Single-left-click the drop-down arrow.
3. Single-left-click DELETE.
To empty the clipboard:
And the best part, if you go to a different program like Excel or PowerPoint and click the launcher in the Clipboard group to display the Office Clipboard, then all the things you collected on the clipboard in Word will be available to use in those other programs as well.
That's why it's called Office Clipboard.
Microsoft Office is the umbrella under which Word, Excel, PowerPoint, Outlook etc. live.
So you can copy stuff in Word and paste it in Excel. Or you could copy stuff in PowerPoint and use it in Word. It's a common clipboard that is available across all the Microsoft Office programs.
4. Word Auditing Tool #4: UNDO & REDO
Everything you do creates an action on a timeline.
To undo the last action:
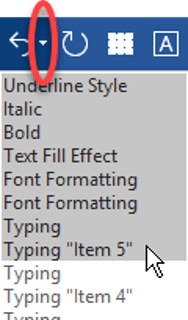
To undo several actions at once:
1. Single-left-click the drop-down arrow on the aforementioned icon icon.
2. Move the mouse pointer down through the list of actions.
3. When you single-left-click, every highlighted action will be UNDONE.
To redo one action at a time:
Shortcut keys you can use:
5. Word Auditing Tool #5: FINDING A TEXT ITEM
To locate an item of text:
1. Select the Home tab.
2. Click in the Editing group, or press §f.
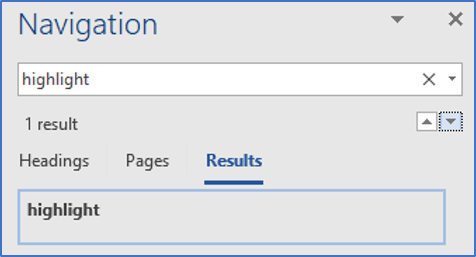
3. The Navigation side pane is displayed.
4. Type a word or phrase into the search box and press ENTER.
6. Word auditing tool #6: REPLACING ONE TEXT ITEM WITH ANOTHER
To replace one text item with another:
1. In the Navigation pane on the left, click the drop-down arrow next to the search phrase.
2. Click REPLACE in the Editing group or press Ctrl H.
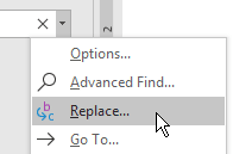
3. The Find and Replace dialog box is displayed
4. In the Find What box, type the text you want to replace.
5. In the Replace With box, type the text that will replace the original text.
6. Click Find Next to find the next occurrence
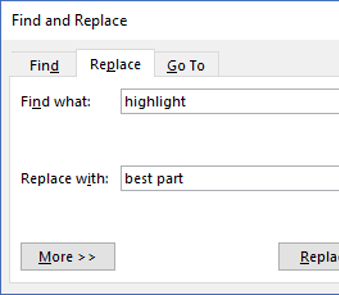
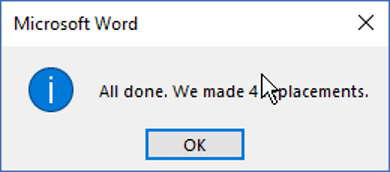
When the text item is found, click Replace to replace just this occurrence with the new text or click Replace All to replace all occurrences of this text item with the new text.
7. Key Takeaways
I hope you found plenty of value in this post. I'd love to hear your biggest takeaway in the comments below together with any questions you may have.
Have a fantastic day.


About the author
Jason Morrell
Jason Morrell is a professional trainer, consultant and course creator who lives on the glorious Gold Coast in Queensland, Australia.
He helps people of all levels unleash and leverage the power contained within Microsoft Office by delivering training, troubleshooting services and taking on client projects. He loves to simplify tricky concepts and provide helpful, proven, actionable advice that can be implemented for quick results.
Purely for amusement he sometimes talks about himself in the third person.
SHARE

