In this post you'll discover how to control your Word page settings to get the best layout for your content and provide all the information that you need, where you need it.
1. Setting the margins
You can change the top, bottom, left and right margins.
To change the margin sizes
1. Select the Layout tab.
2. Click the Margins icon in the Page Setup group.

3. To set your own margin sizes, choose Custom Margins at the very bottom of the list.
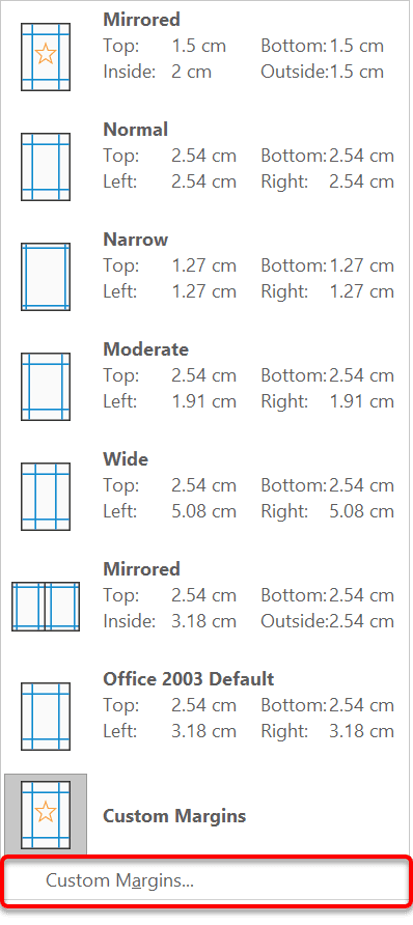
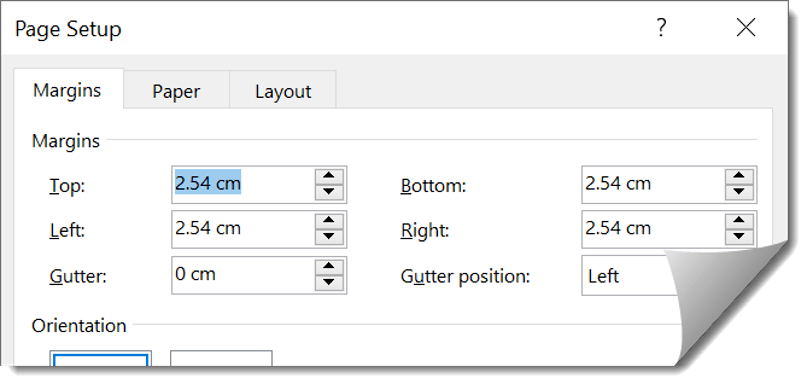
4. Type the margin measurements in the Top, Bottom, Left and Right boxes.
2. Changing the page orientation
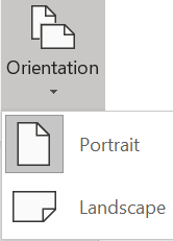
The orientation of the page can be portrait (upright short edge on the base) or landscape (flat, long edge on the base)
To set the page orientation:
1. Select the Layout tab.
2. Click the Orientation icon in the Page Setup group.
3. Click the Portrait or Landscape icon.
3. Changing the paper size
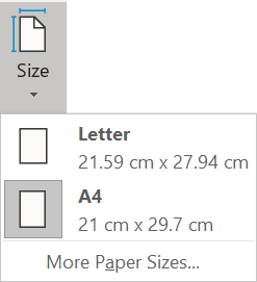
Americans use Letter sized paper.
Most of the rest of the world uses A4.
Because Microsoft is an American company, the default page size on a new installation of Word is Letter.
To change the paper size to A4 (or any other size of your choice):
1. Select the Layout tab.
2. Click the Size icon in the Page Setup group.
3. Choose Letter or A4. If you require a different paper size, click More Paper Sizes at the bottom of the list and select from an extended list
4. Adding page numbers
Once you are comfortable creating a document, it is very useful to display page numbers, normally at the bottom of the screen. But you don't have to insert the pages numbers, page by page. Instead you can use the built-in Word page settings.
To add page numbers:
1. Select the Insert tab.
2. Click the Page Number icon in the Header and Footer group.
3. Choose Top of page or Bottom of page.
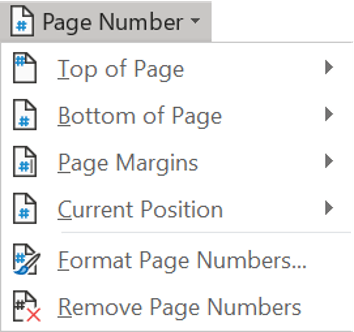
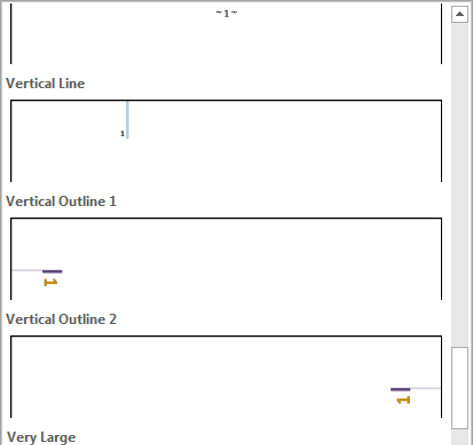
4. Scroll through the design gallery and choose a page number design that you like.
5. Customising the header and footer
Inserting a Page Number (described above) is the simplest example of a header or footer. Headers & footers are created once and appear on every page in your document. They smarten up the appearance of a document by giving it a sense of continuity.
[Note: You can subdivide your document into sections and have a different header and footer for each section. You can even take it one stage further and subdivide each section into a first page and odd and even pages and have different headers and footers for each sub-division].These techniques are covered in the intermediate and advanced Word courses.
Headers and footers typically contain information like author name, company name, document title, file name and of course page numbers.
6. Adding a header/footer template
To choose from a gallery of pre-designed headers and footers:
1. Click the Insert tab.
2. Click the Header or Footer button.
3. Click to choose a design.
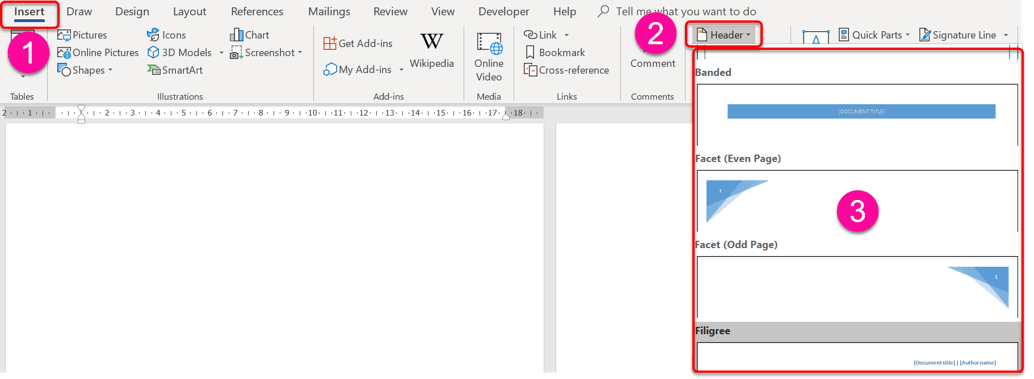
Tip: Choose a matching header and footer design for a more cohesive, nicely designed document.
Alternatively,…
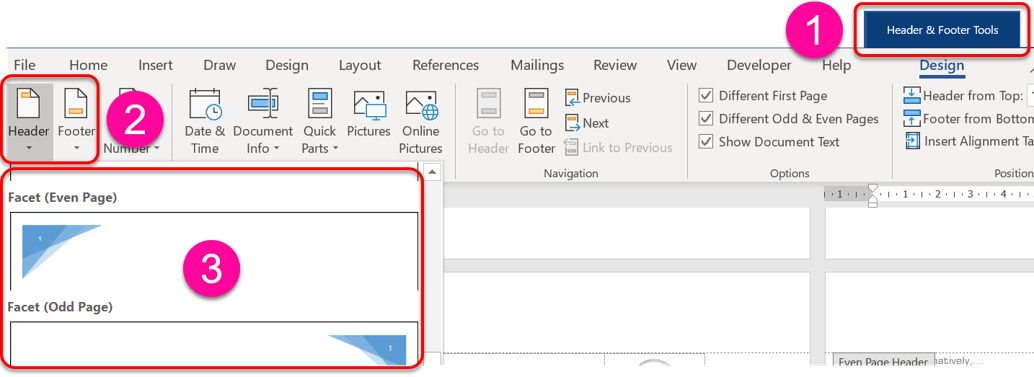
1. Double-left-click inside the top margin area or bottom margin area of the page.
2. On the Header and Footer tools ribbon click the Header or Footer button (on the left side).
3. Click to choose a design.
7. Creating a header/footer from scratch
To create a header or footer:
1. Double-left-click inside the top margin area or bottom margin area of the page.
2. Type or insert any content just like you would on the main page. The main page is dimmed while you work with the header or footer.
Here are some simple ideas you can use in your headers and footers, built right into the Word page settings.
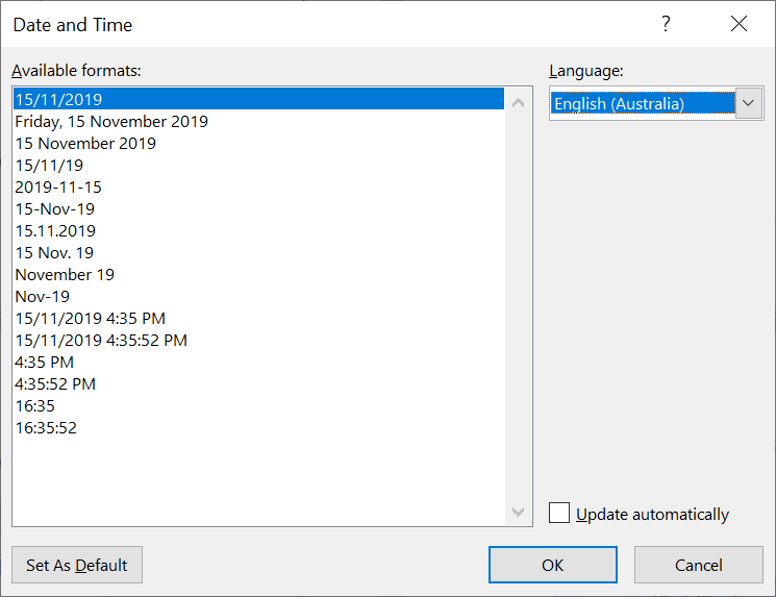
8. Inserting the date/time in the header/footer
1. Double-left-click inside the top margin area or bottom margin area of the page.
2. Position the cursor where you want the date or time to appear
3. On the Header and Footer Tools ribbon click the Date & Time icon

4. Choose a date or time format
5. Click OK
9. Inserting the folder path and filename
1. Double-left-click inside the top margin area or bottom margin area of the page
2. Position the cursor where you want the file name and path to appear
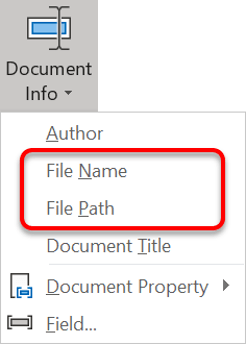
3. On the Header and Footer Tools ribbon click the Document Info icon
4. Click File Name to insert just the file name
5. Click File Path to insert the full path name from the drive letter, all the folders and sub-folders and finally the file name.
This policy is common in many companies to keep track of documents.
10. Key takeaways
I hope you found plenty of value in this post. I'd love to hear your biggest takeaway in the comments below together with any questions you may have.
Have a fantastic day.


About the author
Jason Morrell
Jason Morrell is a professional trainer, consultant and course creator who lives on the glorious Gold Coast in Queensland, Australia.
He helps people of all levels unleash and leverage the power contained within Microsoft Office by delivering training, troubleshooting services and taking on client projects. He loves to simplify tricky concepts and provide helpful, proven, actionable advice that can be implemented for quick results.
Purely for amusement he sometimes talks about himself in the third person.
SHARE

