Pictures can bring your document to life and make it far more interesting to read. In this post you'll discover several different sources of good quality images, both paid and free, and how to integrate and position your image seamlessly amongst text.
1. Why use pictures?
Pictures convey messages and ideas much quicker than text. Humans are visual. We can relate to and remember images much easier.
You can use a picture from a variety of sources, including pictures already on your computer, in a cloud drive or from an online image search. Pictures can also be downloaded from your smartphone or digital device, downloaded from the internet or scanned in.
2. Using a picture already on your computer
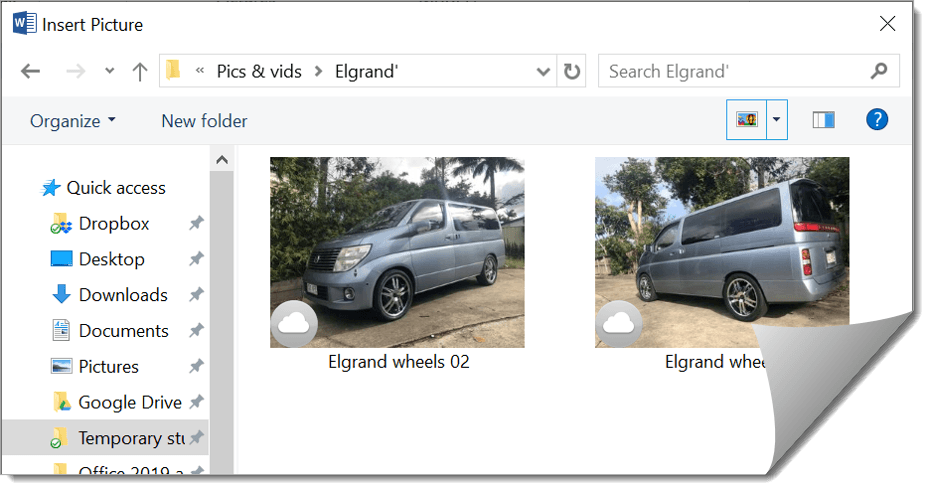
To insert one of your own pictures into a document.
1. Single-left-click the INSERT tab.
2. Single-left-click PICTURES then PICTURE FROM FILE.

3. Navigate to the appropriate folder on your computer then double-left-click the picture to insert it.
3. Adding an online picture
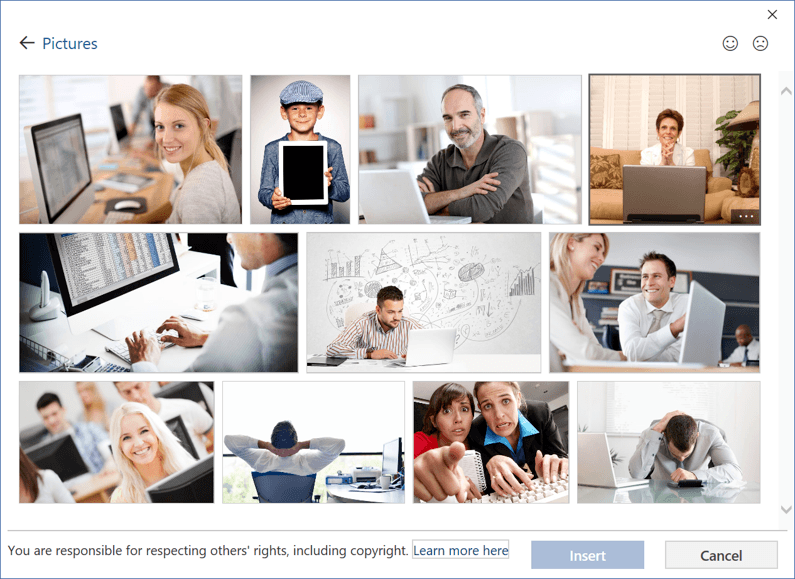
Microsoft provide a Bing online image search within all their programs. This gives you access to a global image library.
To insert an online picture into a document.
Microsoft provide a Bing online image search within all their programs. This gives you access to a global image library.
To insert an online picture into a document.
1. Single-left-click the INSERT tab.
2. Single-left-click ONLINE PICTURES.

3. Either single-left-click a category and then double-left-click a picture within that category …
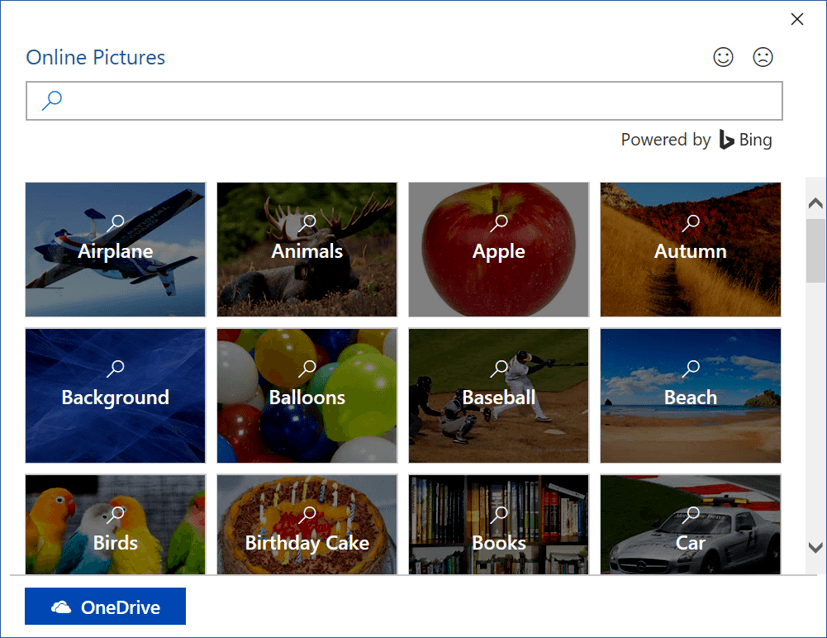
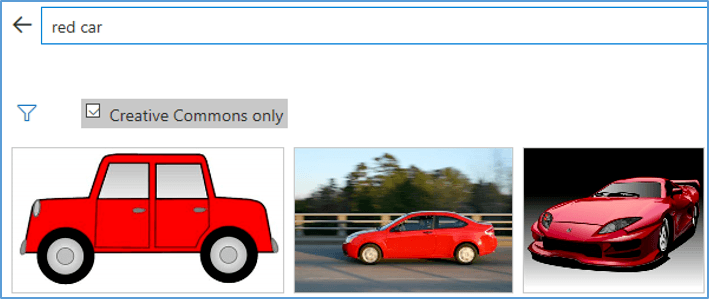
Or, in the search box at the top. type one or more keywords describing the type of picture you want. When the image results are displayed, double-left-click the image you want to use.
4. Be aware of the creative commons license
Be aware of the creative commons licence. There are certain limitations on where you can use an image. If you are not careful, you could inadvertently infringe on a copyright. Take the time to check that you are within your rights to use the image.
5. Enhancing your online search
The more specific the search, the more accurate the results. For example, instead of searching for CAR, you could search for RED CAR or RED SPORTS CAR or 1960s RED SPORTS CAR.
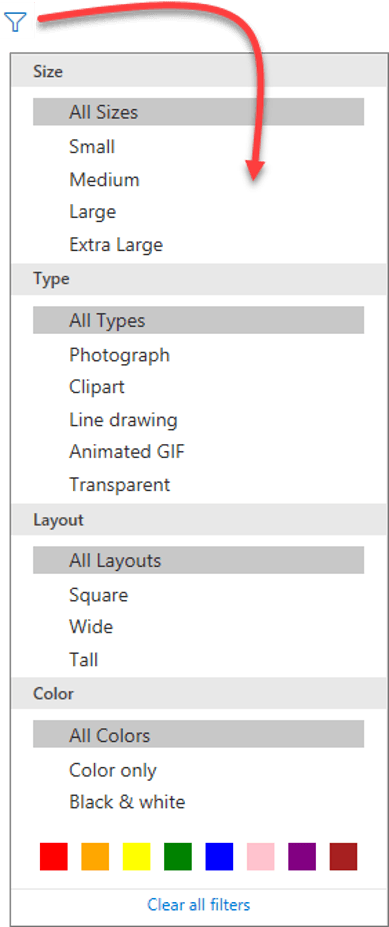
You can also narrow down the style of picture you are searching for.
a) Size
Choose whether you want larger pictures for better definition or smaller pictures to minimise the file size of your publication.
b) Type
Choose what kind of picture you would like.
Avoid CLIPART altogether as this will make your publication look cheesy and dated.
To some degree the same is true with ANIMATED GIFS These are short animations up to 6 seconds long that loop continuously. People who use animated GIFs think they are funny. In reality they are just plain annoying! Plus, they don't work on printed publications unless you're at Hogwarts!
Pictures with TRANSPARENT backgrounds are useful if you want to place them on top of other images or objects.
c) Layout
Wide = landscape.
Tall = Portrait
Square has been made popular by Instagram and FB.
d) Color
Choose a colour from the palette to find images of that specific colour. If one of your keywords is a colour it will be removed.
6. Free stock photos
There are lots of places to find good quality stock photos that are free. These sites provide the opportunity for photographers to share their work and receive exposure. It's win-win. Most of the time there are no limitations on use but check the small print. It's also courteous, but not obligatory, to credit the image owner, Check out these sites.



7. Premium stock photos (not free)
For a small amount of money you can purchase stock images that are high quality and have high resolution (good definition). There are many stock image sites around. Some charge for images individually. Others offer subscriptions.
Check out these sites:


8. Adding a picture from your One Drive
Microsoft provide a Bing online image search within all their programs. This gives you access to a global image library.
To insert a OneDrive picture into a document
1. Single-left-click the INSERT tab.
2. Single-left-click ONLINE PICTURES

3. Click the OneDrive button in the bottom-left corner of the dialog.
4. Locate and select your picture(s).
5. Click the Insert button. The number in brackets after Insert indicates the number of selected images to be inserted.
9. Resizing a picture
To resize an image:
1. Single-left-click the image to select it.
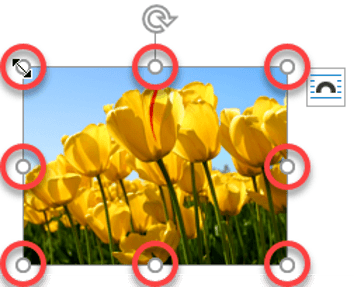
2. There are 8 sizing handles, one on each corner and one halfway along each side. Hover the mouse pointer over anyone.
3. Click-and-drag the sizing handle away from the image to make it bigger and towards the centre of the image to make it smaller.
The corner handles are best because as you resize the image stays in proportion rather than stretching or squishing.
Alternatively:
1. Select the image to select it.
2. On the Picture Tools ribbon, locate the Height and Width measurements of the right-hand side. Then, either type a measurement directly into the boxes or single-left-click the spinner arrows up or down to adjust the size.
The width and height will stay in proportion. As you change one, the other will change automatically.

10. Integrating images with text
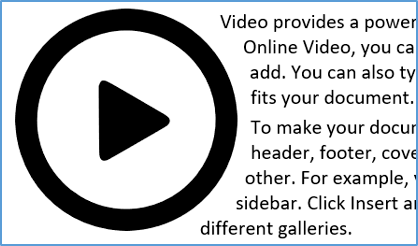
When you first insert an image (from any source), there is a default image setting called In Line With Text that treats the image like a normal letter or number. This has the effect of positioning surrounding text in line with the bottom of the image, like this …
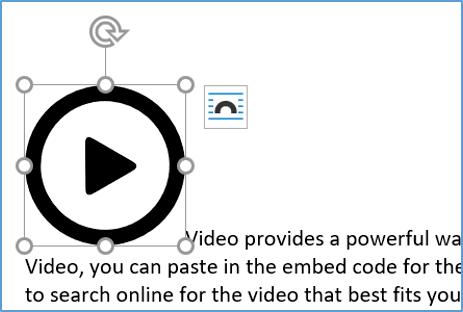
To address this:
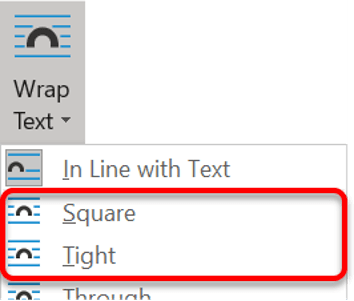
1. Click the Picture Tools tab (or the Format tab under Picture Tools).
2. Choose Tight or Square.
Tight allows the text to follow the shape. Square draws an invisible square frame around the image, so the text is displayed vertically next to the image.
SQUARE

TIGHT
11. Key Takeaways
I hope you found plenty of value in this post. I'd love to hear your biggest takeaway in the comments below together with any questions you may have.
Have a fantastic day.


About the author
Jason Morrell
Jason Morrell is a professional trainer, consultant and course creator who lives on the glorious Gold Coast in Queensland, Australia.
He helps people of all levels unleash and leverage the power contained within Microsoft Office by delivering training, troubleshooting services and taking on client projects. He loves to simplify tricky concepts and provide helpful, proven, actionable advice that can be implemented for quick results.
Purely for amusement he sometimes talks about himself in the third person.
SHARE

