Excel offers 3 levels of protection. You can protect workbooks with 2 different passwords. You can protect worksheets by restricting permissions and access to particular sections. Finally you can protect cells (also known as locking cells).
Locking down important data is a sensible, and often necessary precaution that you should always consider to avoid malicious destruction or accidental loss of your data.
In this post you'll see how these 3 jigsaw pieces work seamlessly together.
1. What protection is available?
Having designed the ultimate workbook and set it up ready for people to use, the last thing you want is for your people to delete important cells or reformat things. Excel provides protection for the author/designer which restricts what users can do.
There are 3 levels of protection available. You can:
2. Protect cells
There are two steps that are required to protect a cell.
1. Lock the cell.
2. Protect the worksheet to activate the cell locks.
To lock the cell:
1. Highlight the cells to be locked.
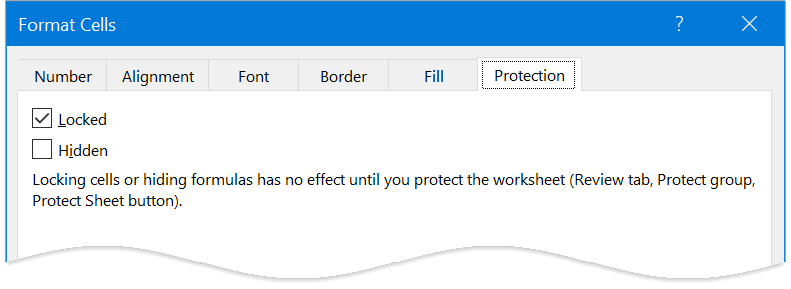
2. Press Ctrl 1 to display the Format Cells dialog box.
3. Click the Protection tab.
4. Tick the Locked box. Take a note of the information message provided in the dialog box.

3. Protect worksheets
To protect worksheets:
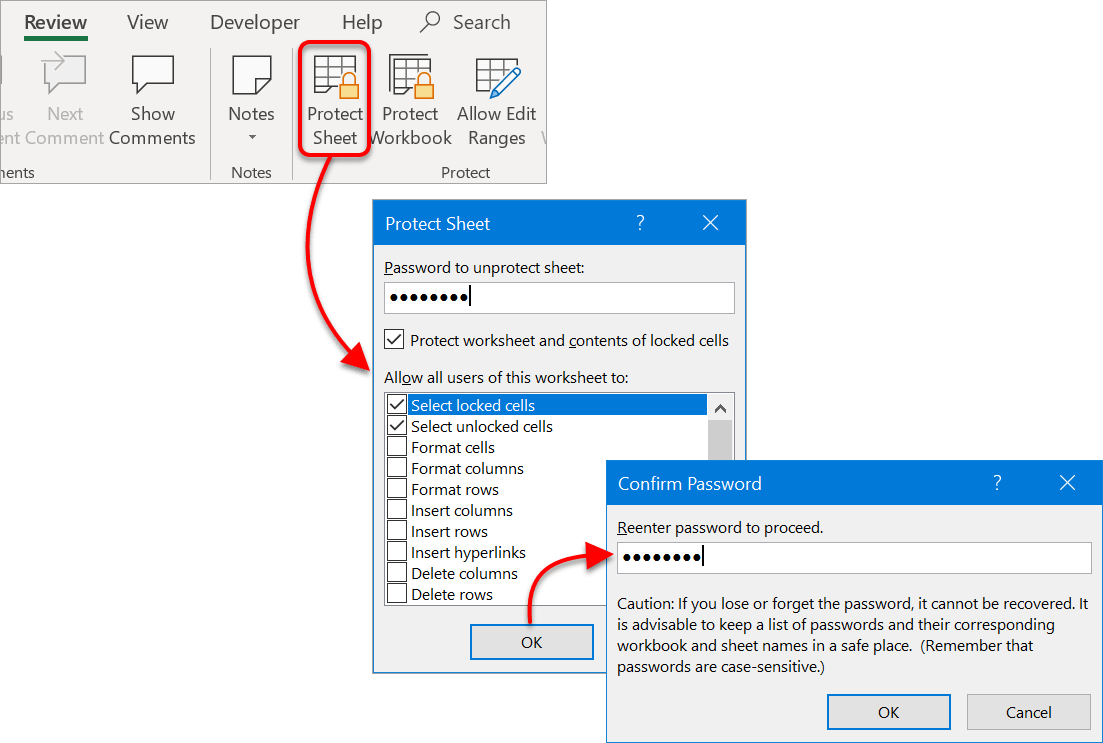
1. Select the Review ribbon.
2. Click the Protect Sheet icon.
3. Select what users are allowed to do with protected (locked) cells. For example, you may want to allow users to select a locked cell but NOT format it, or insert extra rows or columns). If you are not sure, the top 2 options (select locked and unlocked cells) is a good default choice.
4. Enter an optional password. This will be used to unprotect the worksheet in the future. You will be prompted to confirm your password.

4. Unprotecting worksheets
To un-protect worksheets:
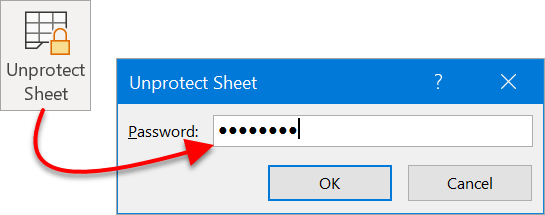
1. Select the appropriate worksheet.
2. Select the Review ribbon if necessary.
3. Click the Unprotect Sheet icon.
4. Enter the password, if one was set.

5. Protect workbooks
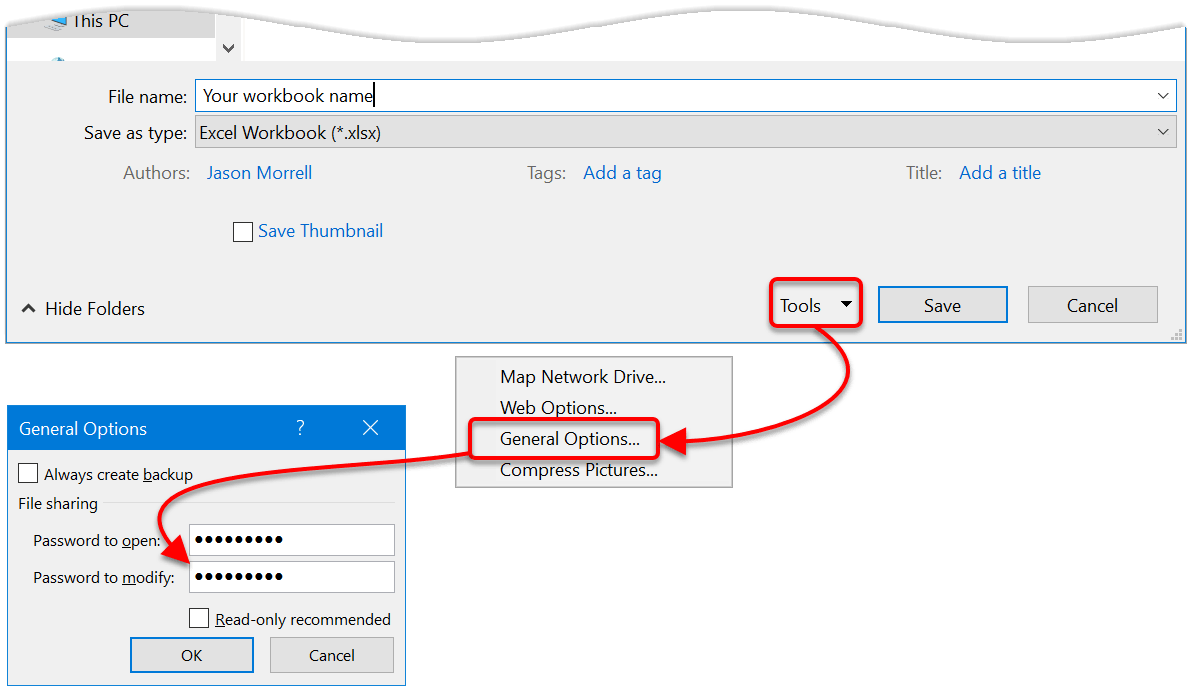
1. Click the File tab then Save As then Browse to display the Save dialog box.
2. Click the Tools menu next to the Save button.
3. Choose General Options.
4. Here, you can enter 2 passwords – one to open the file and one to modify the file – depending on what you want users to be able to do.

6. Key Takeaways
I hope you found plenty of value in this post. I'd love to hear your biggest takeaway in the comments below together with any questions you may have.
Have a fantastic day.


About the author
Jason Morrell
Jason Morrell is a professional trainer, consultant and course creator who lives on the glorious Gold Coast in Queensland, Australia.
He helps people of all levels unleash and leverage the power contained within Microsoft Office by delivering training, troubleshooting services and taking on client projects. He loves to simplify tricky concepts and provide helpful, proven, actionable advice that can be implemented for quick results.
Purely for amusement he sometimes talks about himself in the third person.
SHARE

