The Auditing Checklist below provides a brief overview of the tools you can utilise to pick up and rectify any errors before you share or publish your spreadsheet.
Plus, a couple of useful things that Excel just does for you because it likes you!
1. Auditing checklist #1: Formula AutoCorrect
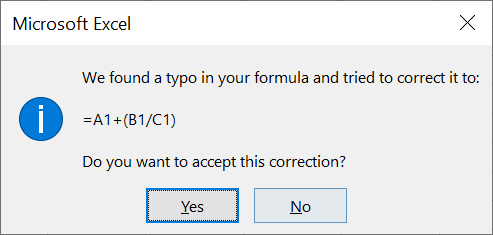
When a formula is typed incorrectly (e.g. a bracket is missed), Excel displays a message box stating the error and proposes a correction.
The proposed correction should be examined before it is accepted as Excel simply takes a best guess and is sometimes wrong.
For example, this formula doesn’t have a closing bracket …

… and when « Enter is pressed the message box appears.
2. Auditing Checklist #2: Spell Check
Before distributing a spreadsheet, always run a Spell Check which checks each word in the worksheet against a build-in dictionary.
Unrecognised words are flagged as potential errors.
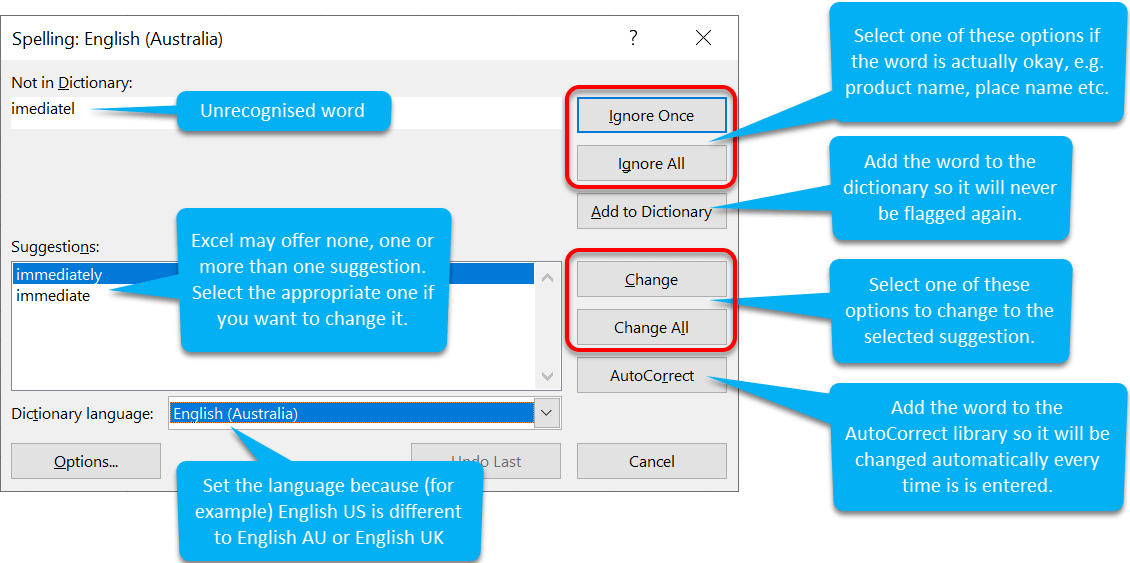
1. Display the Spelling dialog using one of the following techniques.

2. If the flagged word is indeed spelt incorrectly, choose a suggestion from the list then click Change or Change All.
3. If there are no suggestions for the flagged, click back to the worksheet and make the change manually.
4. If the flagged word is spelt incorrectly and is likely to be used again, click AutoCorrect and populate the With box with the correct spelling.
Every time you mistype the flagged word in the future, it will be automatically swapped to the correct spelling.
5. If the flagged word is spelt correctly but just not recognised, click Add to Dictionary to stop it being flagged again or click Ignore Once or Ignore All to let it pass.
If you were not in cell A1 when you initiated the spell check, Excel asks you if you would like to recheck from the beginning of the worksheet. Choose Yes.

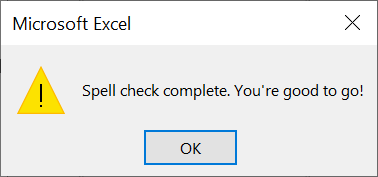
When Excel has checked everything, Excel will provide you with confirmation.
3. Auditing Checklist #3: Find a word or phrase
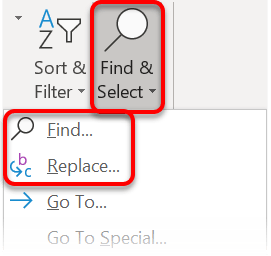
The Find & Replace tool is available to all Office applications. In Excel, it searches the current worksheet and if requested, replaces the selected text with something else.
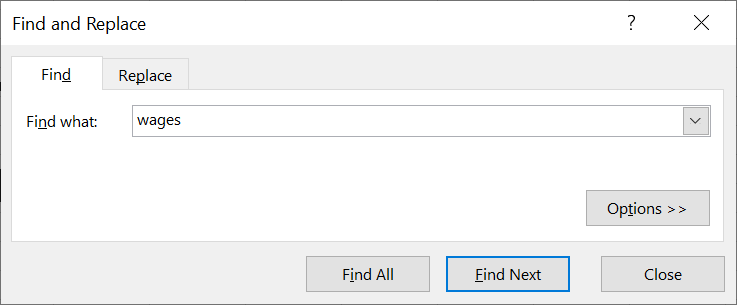
1. Display the Find and Replace dialog using one of these methods:
2. Enter the word or phrase you want to locate.
3. Click Find Next to find the next occurrence of the search word in the worksheet.
4. Click or Find All to list all occurrence of the search word.
4. Auditing Checklist #4: Replace a word or phrase
If you want to do a swapsie:
1. Display the Find and Replace dialog using one of these methods:
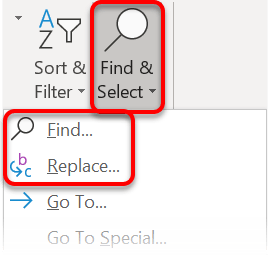
2. Enter the word or phrase you want to locate.
3. In the Find What box, enter the word you wish to find.
4. In the Replace With box, enter the word or phrase that will replace what is found.
5. Click Replace to replace the current entry.
6. Click Replace All to replace all entries within the current worksheet.
5. Auditing Checklist #5: Fine-tuning Find and Replace
In the Find or Replace dialogs, click the Options button to expand the options.
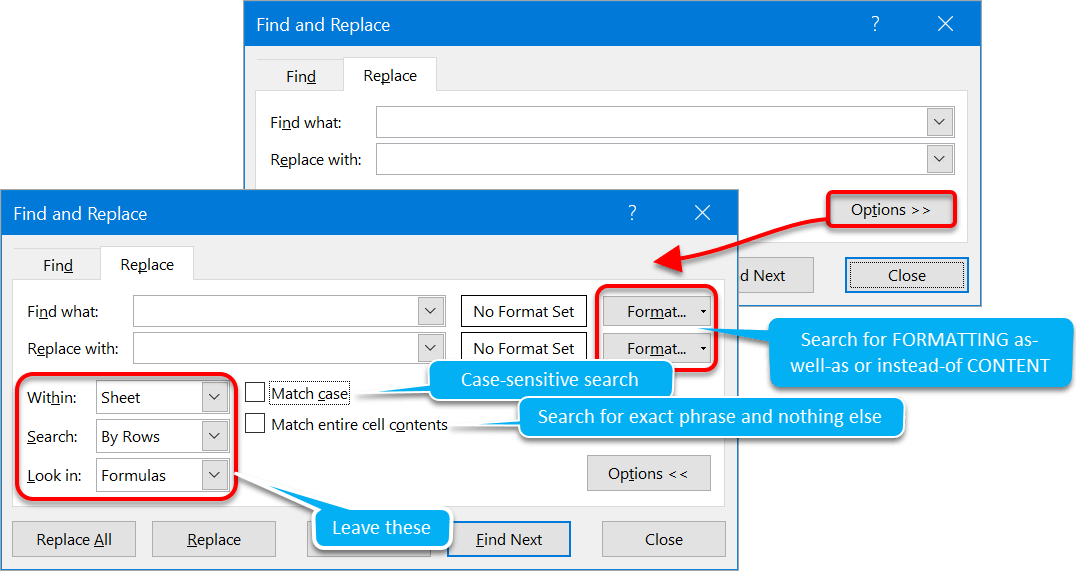
To conduct a case sensitive Find or Replace
To find or replace an exact phrase
To find or replace FORMATS as well as or instead-of just CONTENT
1. Click the Format... button on the Find line or the Replace line. This displays the Find Format dialog which looks and behaves exactly the same as the Format Cells dialog.
2. In the lower left corner, click the Choose Format From Cell... button which gives you an eye dropper tool .
Click any cell to use all the formatting attributes from that cell (e.g. font, colour, size, borders etc.)

3. Click each tab and make any further changes you need.

6. Auditing Checklist #6: AutoCorrect
AutoCorrect is a feature that allows text to be automatically changed as soon as it is typed.
1. Click the File tab, then Options from the left-hand-panel. Click the Proofing option.
2. Click the AutoCorrect Options button.
3. The tick boxes (see 3) do what they say on the tin. By default, they are all ticked. Select or clear each checkbox as appropriate.
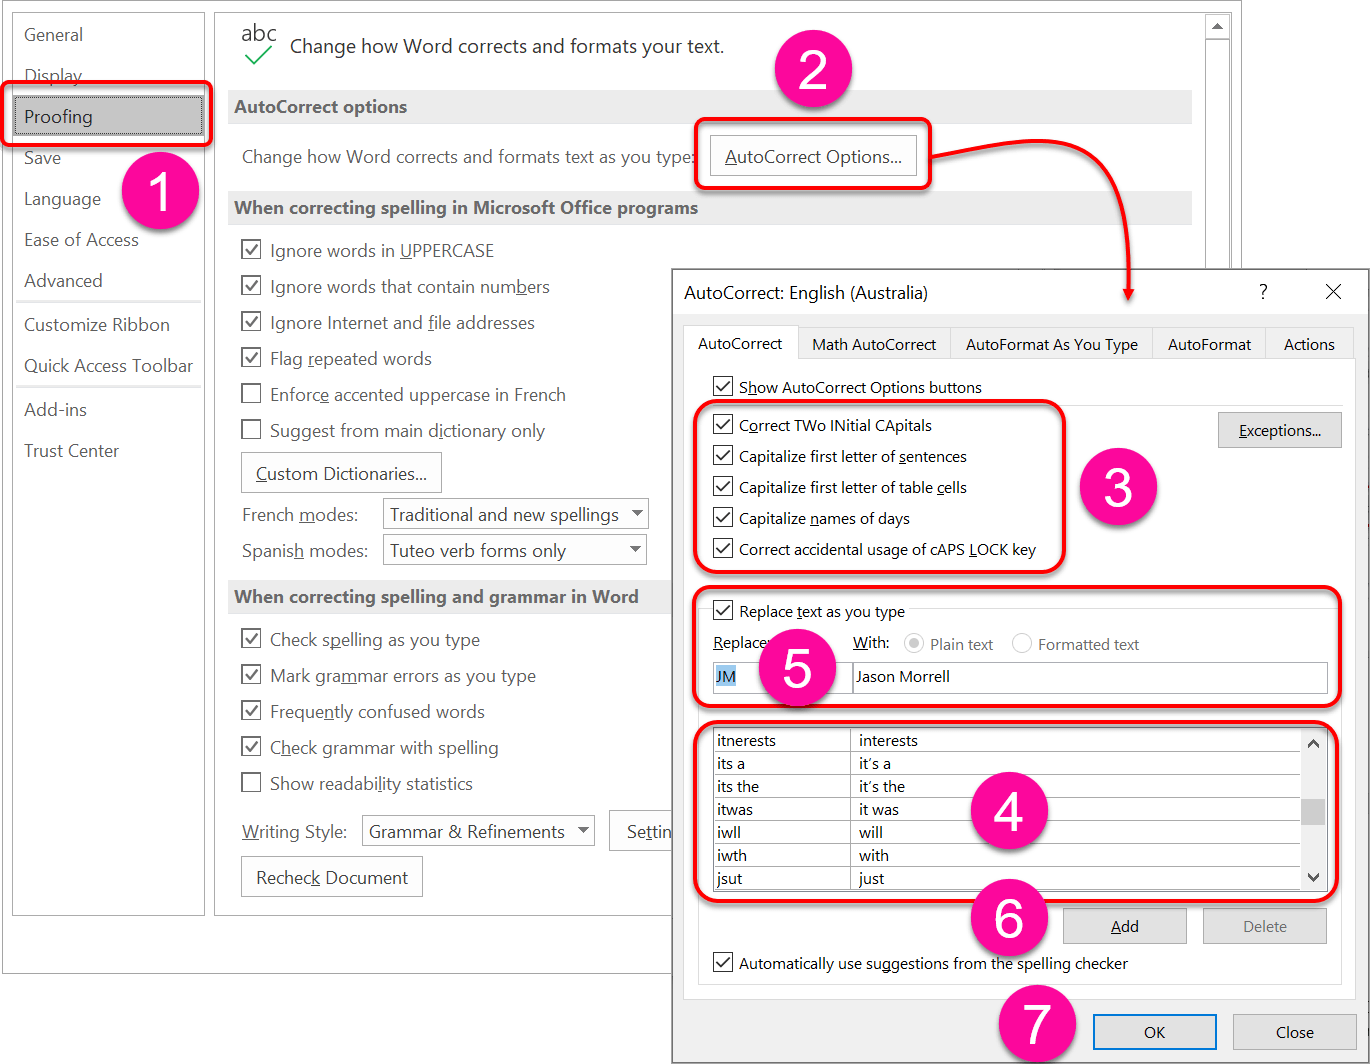
The bottom half of the dialog box is the focus of this section.
There are 2 lists. In your document, when you type something that matches an entry in the Replace list, Word automatically replaces it with the corresponding entry in the With list
There are a number of ways Autocorrect can be used:
To add your own entry:
1. Place the cursor in the Replace box and type an entry.
2. Move the cursor to the With box and type an entry, then click Add
7. Auditing Checklist: Key takeaways
I hope you found plenty of value in this post. I'd love to hear your biggest takeaway in the comments below together with any questions you may have.
Have a fantastic day.


About the author
Jason Morrell
Jason Morrell is a professional trainer, consultant and course creator who lives on the glorious Gold Coast in Queensland, Australia.
He helps people of all levels unleash and leverage the power contained within Microsoft Office by delivering training, troubleshooting services and taking on client projects. He loves to simplify tricky concepts and provide helpful, proven, actionable advice that can be implemented for quick results.
Purely for amusement he sometimes talks about himself in the third person.
SHARE

