A watermark is an image or item of text that appears in the background on every page, behind the text, and often full-page height.
In the old days, you could buy watermarked paper from a stationer. The watermark was often an indication of status, e.g. Basildon Bond is a high-quality brand of stationery.
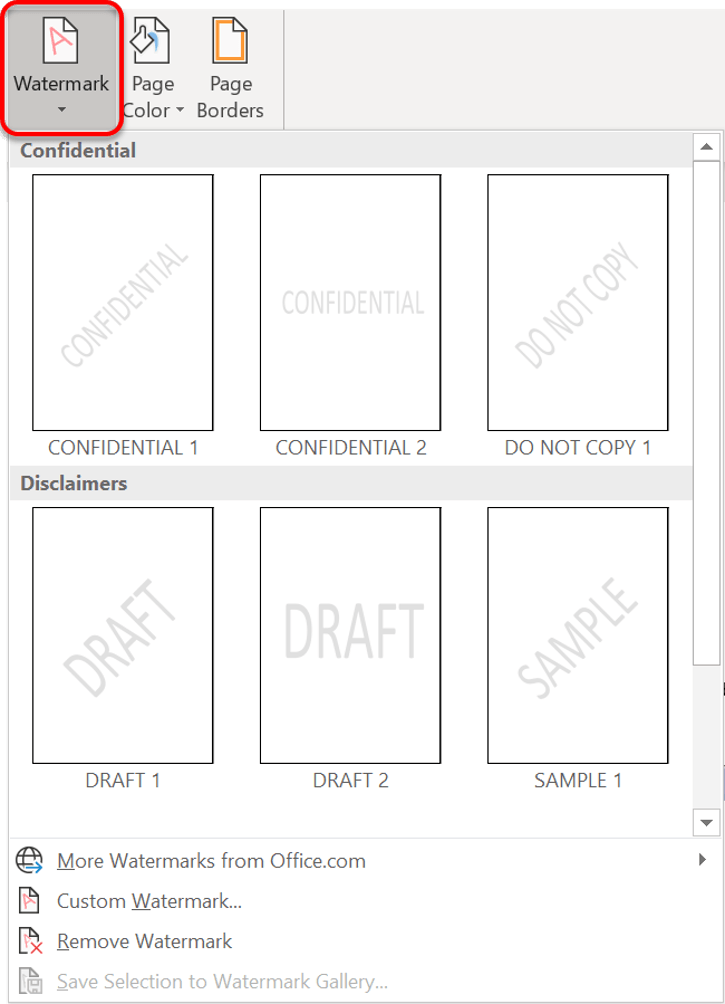
You can create a pre-designed watermark with a single click, and a customised watermark with just a little more effort. You can use text or images as a watermark.
1. Standard Watermarks
To add a predesigned text watermark:
1. Select the Design tab.
2. Click the Watermark icon in the Page Background group.
3. Choose one of the pre-set designs in the gallery. The watermark is added instantly to the pages in the current document.

2. Custom Text Watermarks
To create a customised text watermark:
1. Select the Design tab.
2. Click the Watermark icon in the Page Background group.
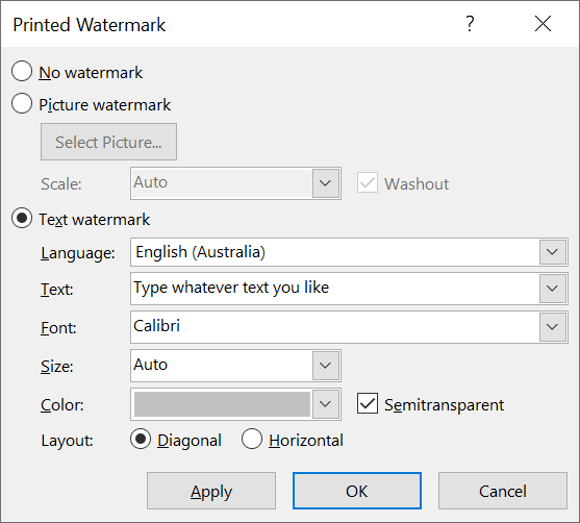
3. Choose Custom Watermark... The Printed Watermark dialog box is displayed.
4. Choose the Text Watermark option.
5. Enter your watermark text in the Text box, and choose the font, size, colour and direction of the text. Leave the Semitransparent tick box ticked.

3. Custom Image Watermarks
To create a customised text watermark:
1. Select the Design tab.
2. Click the Watermark icon in the Page Background group.
3. Choose Custom Watermark... The Printed Watermark dialog box is displayed.
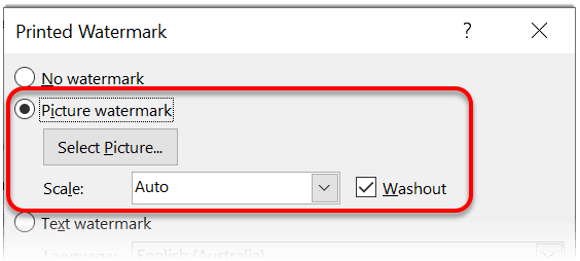
4. Choose the Picture Watermark option.

5. Click the Select Picture... button.
6. Locate and select your image.
7. Tick the Washout box, if you want.
8. Choose a Scale option to resize the image if you want.
9. Click OK
To edit the watermark image or text:
1. Double-click inside the header or footer area.
2. Select the Design tab under the Header & Footer Tools banner, if necessary.
3. Untick the Show Document Text option in the Options group.
4. The watermark image or text (WordArt) can now be selected, resized or manipulated in any way you want.
5. Click the Close Header and Footer icon in the Close group.
To switch off the watermark:
1. Select the Page Layout tab.
2. Click the Watermark icon in the Page Background group.
3. Choose Remove Watermark.
4. Adding a Side Banner on Your Pages
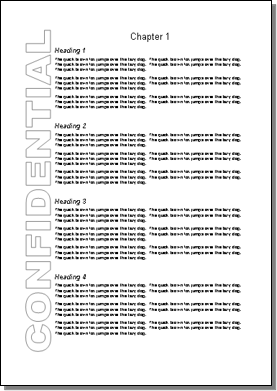
Sometimes, rather than a watermark, you may wish to add a banner down one side of the document, on every page. The technique is similar to adding a watermark, but everything is done through the header and footer.
1. Double-click inside the header area of the page (the top margin area).
2. Select the Design tab under the Header & Footer Tools banner, if necessary.
3. Untick the Show Document Text option in the Options group.
4. Insert a WordArt with the required text.
5. Rotate the text 90 degrees to display it vertically.
6. Stretch the WordArt image to full page height and position to the left, or the right side of the page.
7. Using the WordArt tools, set the Word Wrapping to Square. This prevents the document text from overlapping the WordArt text.
8. Click the Close Header and Footer icon in the Close group.

How have you used watermarks to good effect?
Here are some other advanced text effects you may be interested in.
I hope you found plenty of value in this post. I'd love to hear your biggest takeaway in the comments below together with any questions you may have.
Have a fantastic day.


About the author
Jason Morrell
Jason Morrell is a professional trainer, consultant and course creator who lives on the glorious Gold Coast in Queensland, Australia.
He helps people of all levels unleash and leverage the power contained within Microsoft Office by delivering training, troubleshooting services and taking on client projects. He loves to simplify tricky concepts and provide helpful, proven, actionable advice that can be implemented for quick results.
Purely for amusement he sometimes talks about himself in the third person.
SHARE


Didn’t follow this at all. Which version of word are you working with? I don’t see anything that tells us that. I would have thought that it would be important to say which versions your description works with.
Hi Vic
The watermark has been part of Microsoft Word’s feature set since 2002. However, there are two very different versions of Microsoft Word – the desktop app and the web app.
The desktop app has to be downloaded and contains the full feature set including the Watermark.
The web app is accessed via your browser (office.com) and is a mickey-mouse version of Word that contains a very basic feature set that does not include the Watermark.
I hope that clarifies the situation.