Dual multilevel numbering in Word is where you have two independent multilevel numbering systems running through your document. It requires a bit of extra setup, but if you get this step right, you will reap the rewards later.
In this post, I explain why the conventional way of setting up your numbering will not work.
Then, with that context, I'll explain step-by-step how to set things up correctly.
1. What does 'Dual Multilevel Numbering' look like?
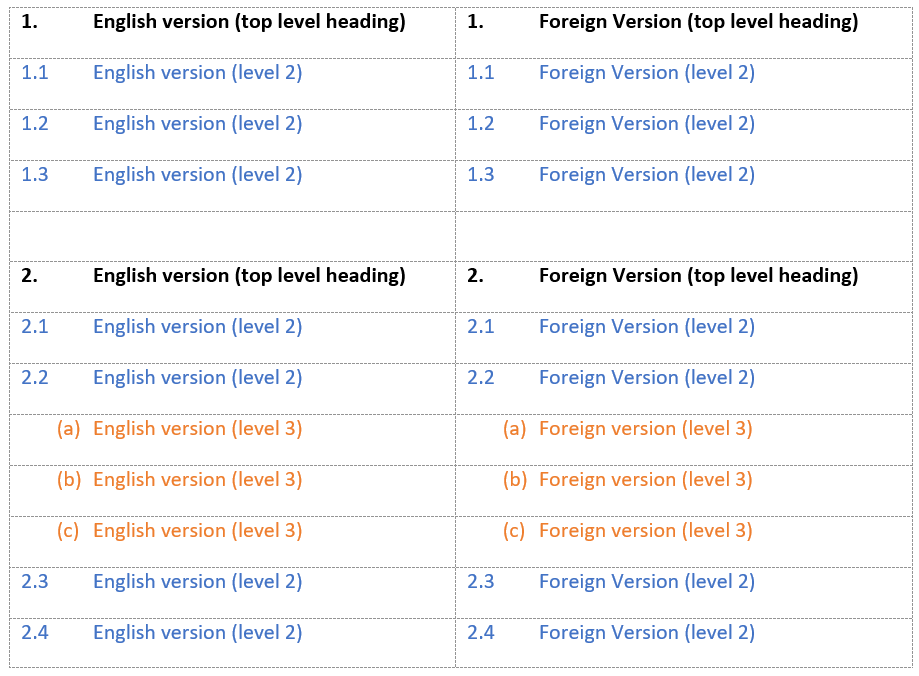
Take a look at this example.
This is an overly simplified dual-language contract that will be used throughout this post.
The left-hand column contains the English portion of the contract and the right-hand column contains the corresponding foreign language portion.
The content is organised inside a table with invisible borders so that everything remains aligned.
The colour has been added to help to visually distinguish between each level.

Notice how the numbering of the top-level headings are in sync.
As are the 1.1 ... 1.2 ... 1.3 content on level 2 and the (a) (b) (c) content on level 3.
I'll circle around to how this has been set up, but first, let's look at ...
2. How NOT to set up dual multilevel numbering in Word
If you're not sure how to set up multilevel numbering or styles, check out these links first. They will provide context for the next section.
1. How to set up multilevel numbering in Word (post) or you can watch it here.
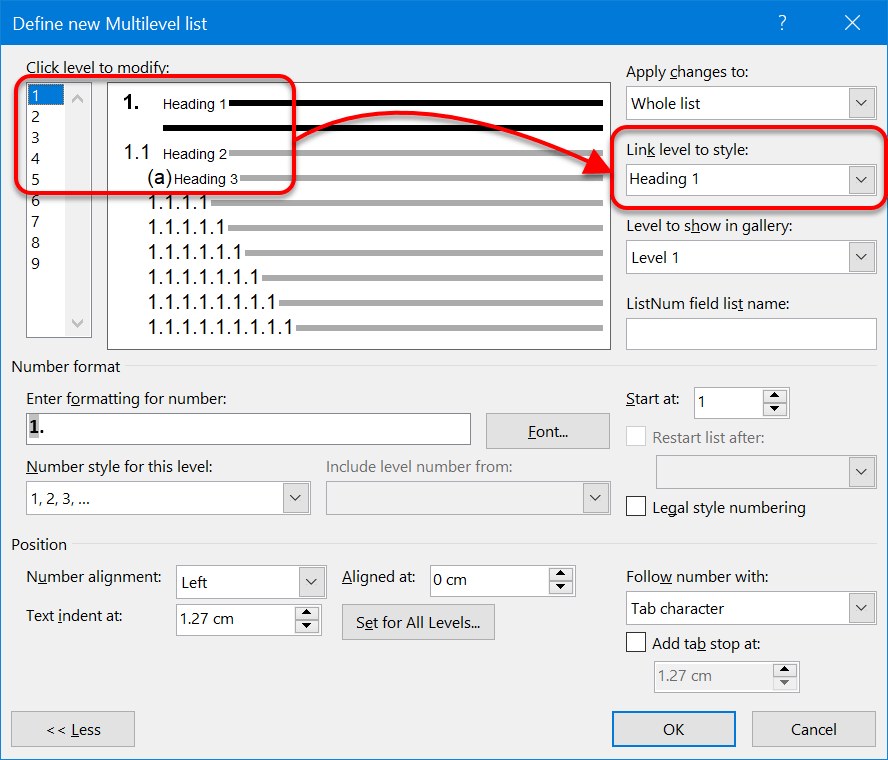
When you define a conventional multilevel list style, each numbering level is linked to the built-in Heading 1, Heading 2 and Heading 3 styles, like this ...

... and you can define the 'look' of each numbering level (fonts, colours etc.) by modifying the style definitions.
For example:

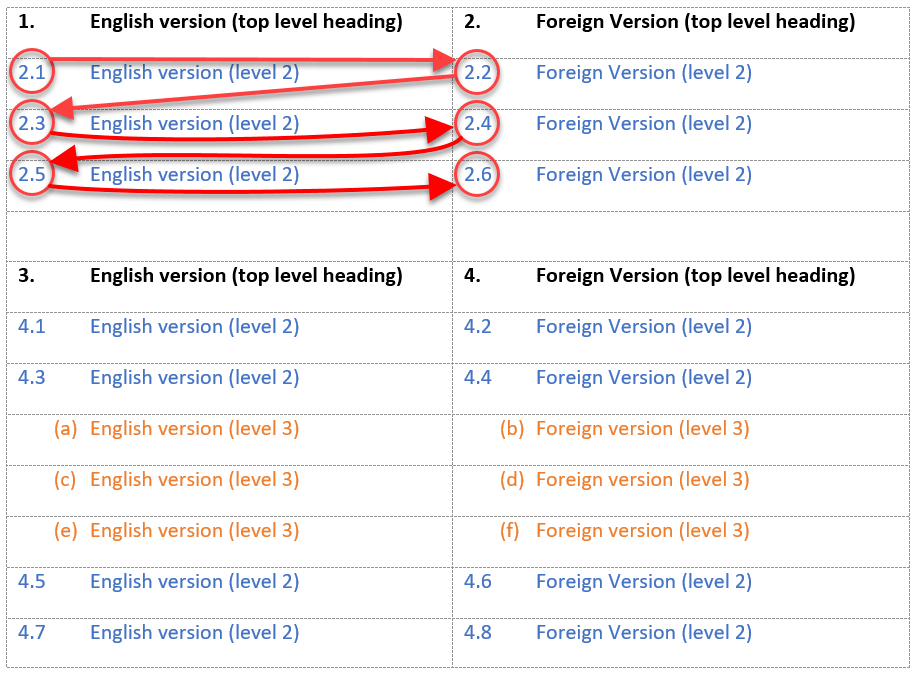
But this results in the numbering flowing from one column the other, in a left-to-right, top-to-bottom sequence. Therefore the numbering between the left and right columns does not align correctly.

You can see that using the same style on both the left and right columns is a mistake.
So now, let's take a look at ...
3. How to set up dual multilevel numbering in Word (correctly)
Step 1: Define custom styles
Instead of a common set of styles - Heading 1, Heading 2 and Heading 3, it is necessary to set up an independent set of styles and associated numbering system for each column.
For this scenario, I have set up 6 new custom styles. You can use the attributes of the existing styles to save some time. The new styles are:
Each pair of styles, left and right, have been set up with identical styling.

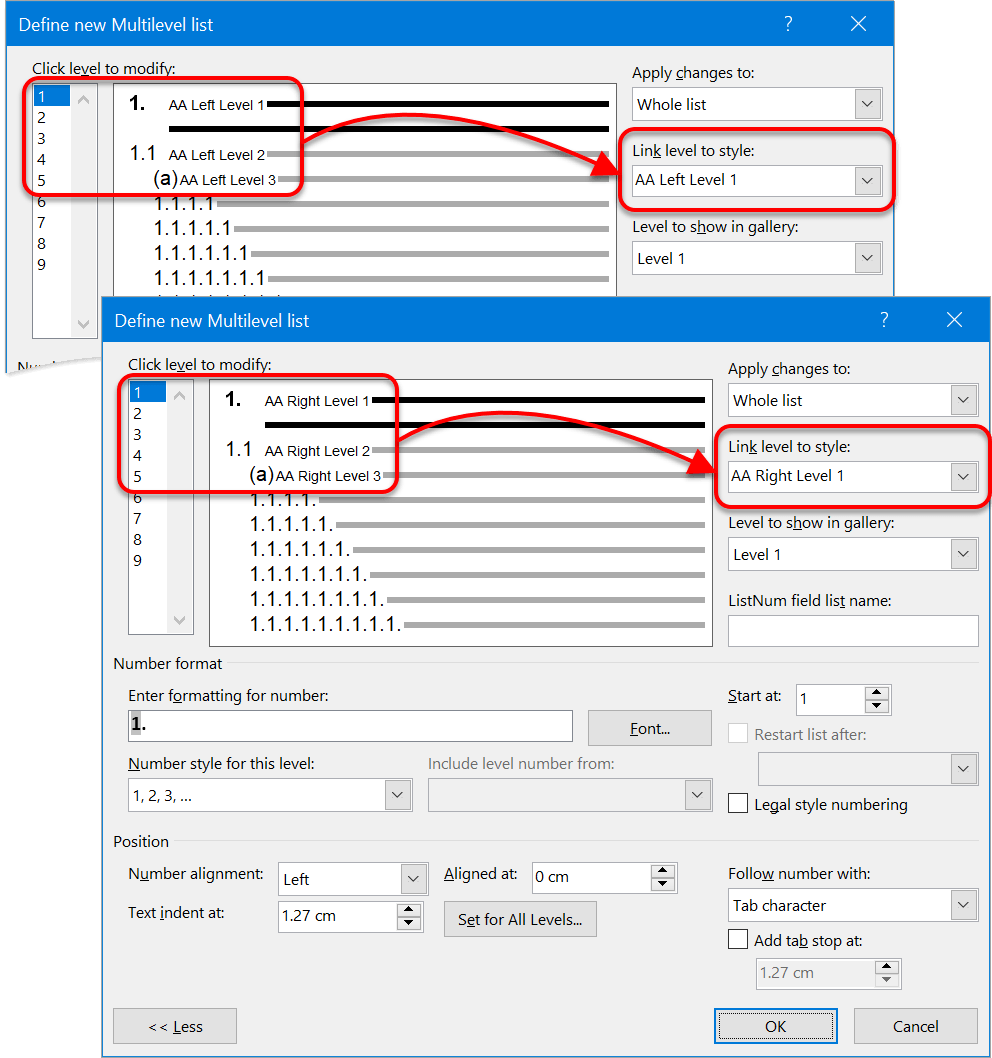
Step 2: Create two independent numbering systems
I defined two separate numbering systems, again with identical settings, except for the styles that each level links to.

Step 3: Apply the appropriate styles where needed
In the left column, I applied the styles AA Left Level 1/2/3.
In the right column, I applied the styles AA Right Level 1/2/3.
And that's it. No need to overcomplicate it. This technique works on documents of any size.
I hope you found plenty of value in this post. I'd love to hear your biggest takeaway in the comments below together with any questions you may have.
Have a fantastic day.


About the author
Jason Morrell
Jason Morrell is a professional trainer, consultant and course creator who lives on the glorious Gold Coast in Queensland, Australia.
He helps people of all levels unleash and leverage the power contained within Microsoft Office by delivering training, troubleshooting services and taking on client projects. He loves to simplify tricky concepts and provide helpful, proven, actionable advice that can be implemented for quick results.
Purely for amusement he sometimes talks about himself in the third person.
SHARE


