In this post you'll discover different ways that the Paste Special tool in Excel can be used to give you more control over what happens to your data.
1. What is Paste Special?
With an ordinary cut / copy / paste operation, not only are the original cell contents pasted to the destination cell(s), but so is all the formatting, such as borders, shading and column widths.
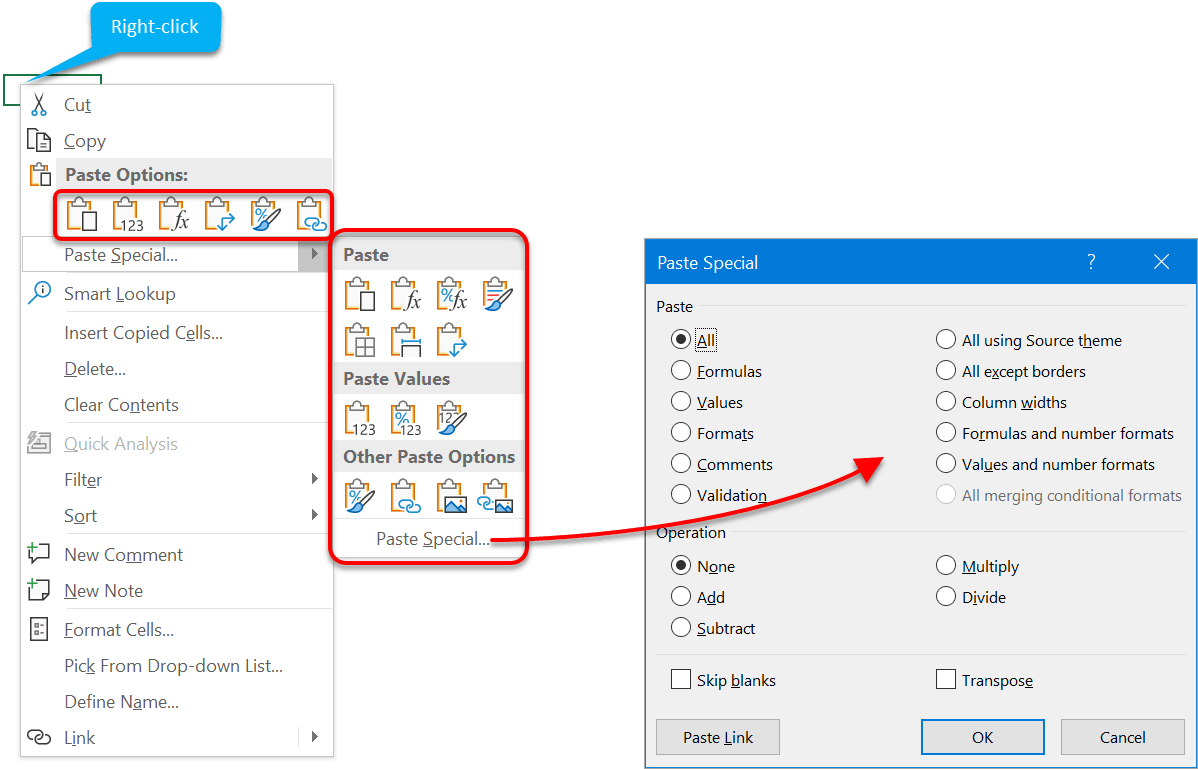
The Paste Special feature allows the values, formulas or formats of the original cell(s) to be pasted individually. Therefore, the user has far greater control over what is pasted.
To use the Paste Special feature:

2. Choosing which component(s) to paste
The Paste section of the dialog box lists each component of the original cell(s). Only one option may be selected. All is the default and will paste the contents (formulas or values), formatting (borders, shading, fonts etc.), number formats, comments, validation and column widths. This is what a normal Paste operation does.
![[Add] 10 - 02 component Choosing which component to paste](http://officemastery.com/wp-content/uploads/2020/03/Add-10-02-component.png)
3. How to create a link between the copied and pasted data
If All or All except borders is selected from the Paste section of the Paste Special dialog box, then the Paste Link button becomes available. If this button is clicked instead of OK then a link is created between the original data and the pasted data. This means that if the original data changes, the change is reflected in the pasted data.
4. Using Paste Special to consolidate data
The second section of the dialog box titled Operation allows the contents of the source cell to be combined with the existing contents of the destination cell.
For example, if the source cell contains the value 5 and the destination cell currently contains 10 and Add is chosen from the Paste Special dialog box, the destination cell will then have the value 15.
![[Add] 10 - 03 operation Using paste special to consolidate data](http://officemastery.com/wp-content/uploads/2020/03/Add-10-03-operation.png)
5. Transposing data using Paste Special
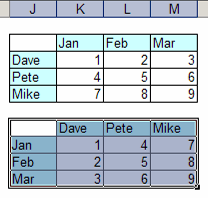
If a table is transposed, the column headings become the row headings and the row headings become the column headings. The data shifts around automatically.
In the Paste Special dialog, check/tick the box labelled Transpose.
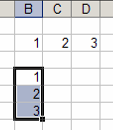
Transpose data from horizontal to vertical

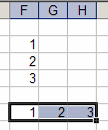
Transpose data from vertical to horizontal

Transpose the entire table (rows become columns and vice versa)

6. Key Takeaways
I hope you found plenty of value in this post. I'd love to hear your biggest takeaway in the comments below together with any questions you may have.
Have a fantastic day.


About the author
Jason Morrell
Jason Morrell is a professional trainer, consultant and course creator who lives on the glorious Gold Coast in Queensland, Australia.
He helps people of all levels unleash and leverage the power contained within Microsoft Office by delivering training, troubleshooting services and taking on client projects. He loves to simplify tricky concepts and provide helpful, proven, actionable advice that can be implemented for quick results.
Purely for amusement he sometimes talks about himself in the third person.
SHARE

