Table of Contents, Figs & Auths
In this post you'll discover how to mark citations within your document then collate all citations into a Table of Authorities.
This is the final part of a 3-part series.
RELATED POST:
Part 1: How to create a Table of Contents
RELATED POST:
Part 2: How to create a Table of Figures
If you cite sources within your document such as case studies, regulations, statutes etc. a table of authorities can be generated to list all these sources.
Building a table of authorities requires a 2-step process.
First, citations (which are simply blocks of selected text) must be marked.
Second, marked citations are used to create the Table of Authorities.
A TA field code is inserted into the document every time a citation is marked.
1. Mark citations
To mark citations for inclusion in the table of authorities.
1. Select the citation text to be included in the table of authorities. You may also just position the cursor without selecting the text).
2. Select the References tab.
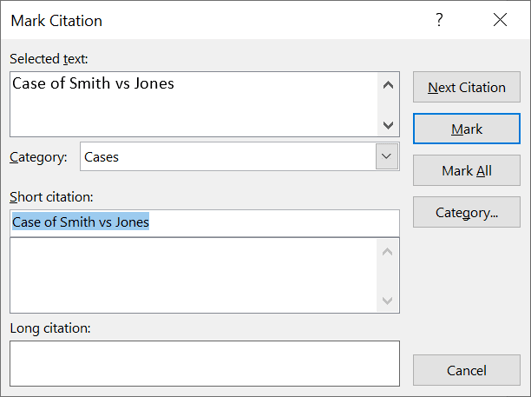
3. Click the Mark Citation icon Table of Authorities group.

4. Edit the short citation if necessary.
5. Add a long citation, if you want.

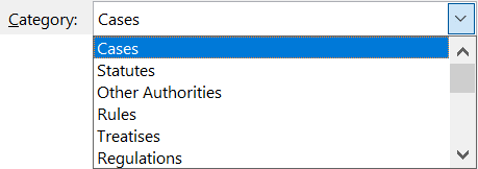
6. Using the drop-down list, choose which category to assign the citation to.

7. Click Mark to mark just this one occurrence of the citation, or
8. Click Marl All to mark all instances of this citation within the document.
9. Repeat for any other citations you want to mark. You can click on the document or on the dialog box to switch the focus, without closing the dialog box each time.
10. Click Close to finish.
2. Customise the citation category list
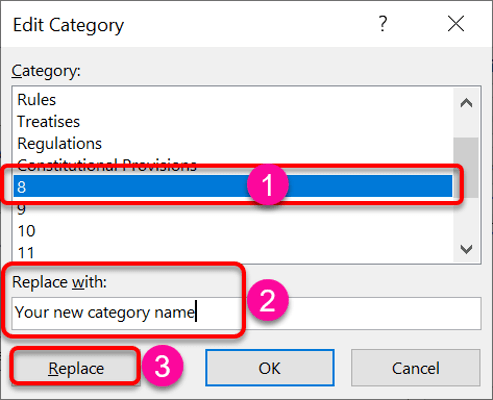
1. Click the button in the Mark Citation dialog box.
2. Select one of the existing categories.
3. Type the new name in the Replace With Box.
4. Click Replace
5. Click OK

3. Generate the table of authorities
1. Position the cursor in the document, where the table of authorities will be inserted.
2. Select the References tab.
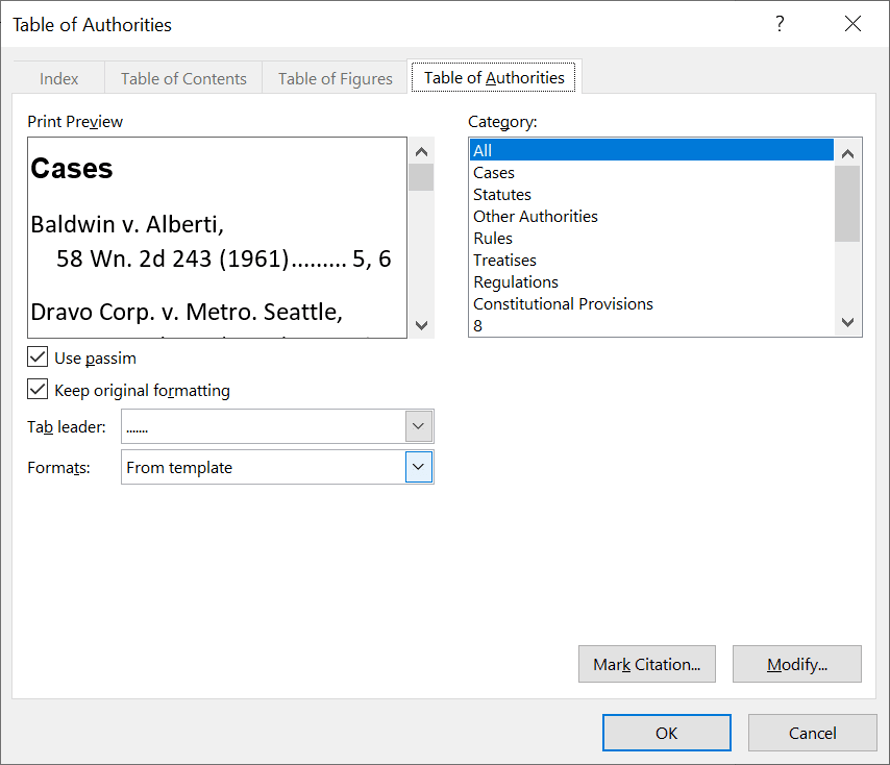
3. Click the Insert Table of Authorities icon in the Table of Authorities group.
4. Choose a general format from the Formats drop-down list. The Print Preview box at the top-left of the dialog box provides an indication of how the table of authorities will look. The default is From Template. Each format sets a particular combination of settings in the other options, like page numbers and tab leaders.
5. The tab leader joins the item of content to the page number. The dotted tab leader works best in most situations. To modify or remove the tab leader select an option from the Tab leader drop-down list.
6. If any of your cases are cited five or more times, instead of cluttering your table of authorities, Word will insert “passim” for the second and subsequent citations to save room. Think of “passim” like “etc.” or “and more”. Passim is ticked by default. To see a full list of page numbers, untick the box.
7. Check the preview to make sure everything looks okay, then click OK.

4. Key points
RELATED POST:
2 ways to build an Index page in Word
I hope you found plenty of value in this post. I'd love to hear your biggest takeaway in the comments below together with any questions you may have.
Have a fantastic day.


About the author
Jason Morrell
Jason Morrell is a professional trainer, consultant and course creator who lives on the glorious Gold Coast in Queensland, Australia.
He helps people of all levels unleash and leverage the power contained within Microsoft Office by delivering training, troubleshooting services and taking on client projects. He loves to simplify tricky concepts and provide helpful, proven, actionable advice that can be implemented for quick results.
Purely for amusement he sometimes talks about himself in the third person.
SHARE

